Hello peepsicles!
Before I show you my 'make' I'd like to say hello and thank you to all my recent new followers. I hope you like what I create and maybe take away with you a little inspiration!
Some thing a bit different from me this time. Last week I sowed some sunflowers and I thought that giving someone a packet of sunflower seeds in a lovely gift bag with printed instructions would make a nice little present.
This is the end result...
What you need...
Digital die image: Sunflower (#M41232) - Stretch Your Imagination Summer Cartridge; Gift Bag (#M17D795) - Creative Bug Cartridge; Graduate Label (#M67822) Summer Soirees Cartridge - Cricut®
Font: Dog Heaven - Lyrical Letters 2 Cartridge - Cricut®
Card stock: black, bright yellow, brown, green (single sided), white
Cricut® Vinyl - Olive
Cricut® Pen - Sour Apple
Cricut® Pen - Sour Apple
Gems: clear
Ribbon: yellow
Ribbon: yellow
Adhesives
What you do...
Select the images and add to the Design Space.
You will need six sunflowers.
Re size all the images to suit.
Insert a text box, type the instructions, edit with Dog Heaven font and place it over one of the white labels. 'Attach' it so that the text will be written directly onto the label. The software will tell you when to insert the pen into the holder.
Insert another text box and type 'Sunflower Seeds', again edit with the Dog Heaven font.
Cut out the sunflowers in yellow, brown and black card, the gift bag in green card, the label layers in brown and white card (one will be done with the writing) and the 'Sunflower Seeds' in Olive vinyl.
Assemble to gift bag, sunflowers and labels.
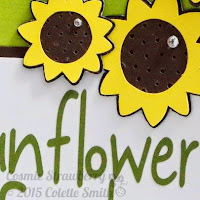
Attach the 'Sunflower Seeds' label to the front with three sunflowers.
Place the instructions label on the back of the bag along with two sunflowers.
Thread yellow ribbon through the holes in the top of the bag, before tying punch a hole in the remaining sunflower and thread onto the ribbon. Tie in a bow at the front.
Add a gem to each sunflower to finish.
It's so amazing the the Explore can write out such intricate lettering, it's fascinating to watch it do it.
If you don't have any single sided colour card stock, cover the scalloped portion with a coordinating patterned paper.
I do hope you like this little project, I had such fun creating it. Thank you for stopping by and I'll be back soon, ttfn! x


3 comments:
LURVE this little bag, it's wonderfully sunny and happy and a GREAT gift too.
Ohhh, I love it! Stunning strong colours and fabulous tutorial xx
a great little gift and love the sunflower images-my two little grandaughters have just planted some sunflowers -a harmless little competition-well untill they start growing then the fireworks will start lol
carol x
Post a Comment