Showing posts with label Distress Ink. Show all posts

Tuesday, 30 March 2021

If You Were Milk - Snarky Cat

Hello there!

I'm back with another card. This one is very quirky and snarky. I have used the oh so funny Snarky Cats by Tim Holtz. The cat I used in this one went perfectly with the sentiment, its face says it all.


What you need...

Stamps:
Tim Holtz Snarky Cats (CMS392) - Stampers Anonymous

Stencil:
Circle Extraordinaire (ST-122) - My Favorite Things

Ink pads:
Dried Marigold - Tim Holtz Distress
Squeezed Lemonade
Twisted Citron
Tuxedo Black - Memento

Embellishments:
Midnight Mix Sequins - Little Things from Lucy's Cards

Washi tape:
Black/white houndstooth - MT

Card stock:
white

Extras:
Adhesives
Masking paper - Inkadinkado

What you do...

1 Cut a piece of white card stock 4"x 5¼" (10.5cm x 13.5cm) and position the stencil so it sits central. Use the stencil to get an idea where you want the cat to go. 

2 Ink up the cat and stamp so it sits near the lower right corner. Stamp the cat again onto some masking paper and fussy cut out. Place over the original cat.

3 Replace the stencil and blend the inks, starting with Dried Marigold followed by Squeezed Lemonade and finishing with Twisted Citron. Remove the masking paper.

4 Add a strip of Washi tape across the bottom of the panel so it lies at an angle and immediately under the cat.

5 Stamp the sentiment at the top left of the circle.

6 Mat the panel onto a white 4¼"x 5½" (11cm x 14cm) top fold blank. Add some black sequins to decorate.

I always use a quick drying dye ink to stamp the image onto the card panel and masking paper otherwise it can smudge when you ink blend over it. If you have a stamping platform, keep the cat stamp on the platform and after removing the mask, stamp over the cat with a crisp, rich ink such as Onyx Black by Versafine. This will really make the original stamped image pop with the risk of smudging.

Sometimes if you don't use a quick drying dye ink on the original image, the masking paper can pick up some of the ink and transfer it onto your card panel if you have to reposition it. Not good.

I hope you like my snarky little card, I have the Christmas version too, so I'm looking forward to playing with that one.

As always, thank you for stopping by and take care. 

Thursday, 23 May 2013

Make Lemonade!

Hello Chums!

Have you missed me? I've missed you...but now I'm back.

I managed to get the commissions for Crafts Beautiful sent off and now I have a bit of time before I start the next PaperCrafter and CB commissions.

So, as I've been busy with the magazine stuff (amongst other things) I've not really had time to do a bit of card making for myself, so here is another card with a fruity theme from the May 2012 issue of CB.


What you need...

Patterned papers: Country Drive Collection Kit - Echo Park
Card stock: white, yellow, pale yellow
Baker's twine: yellow
Ink: Black Soot Distress Ink - Ranger
Gel pen: white
Adhesives

What you do...

Cover an A6 top fold blank with pale yellow card. Cut a piece of honeycomb paper to size and trim away the bottom third, following the line of honeycombs. Stick to the top of the blank, wrap and tie yellow twine around the card, just above the edge of the paper.

Download the template from the Crafts Beautiful website and make the lemons from yellow and white card. Ink the edges black and highlight with white pen. Adhere to the lower left of the blank and create a sentiment in rub-on lettering at the top right.

This card is perfect to give to someone who maybe has just come through a rough time or illness, it's bright, cheery and lets them know you are thinking of them.

There are lots of other free templates and papers to download from the CB website. It's quick, free and simple to join.

Because this was made quite some time ago, the paper collection may not be available now (though you might find the odd one out there in the Internet world), but any bright, zesty paper would work just as well.

Well, that's me for now. I just wanted to touch base with you all and let you know I'm still about! Thanks for popping by xxx
post signature


Thursday, 9 May 2013

Crafts Beautiful June 2013 Issue

Whatcha peeps!

Hope you are all well. The weekend will soon be here...yay!

I have a couple of posts for you today, the first one showcasing may projects in the June issue of Crafts Beautiful.

The theme is tie dye and I had great fun getting messy with inks. They are really bright colours, so the mess didn't look too bad - I just had technicolour hands.

Saying Hello


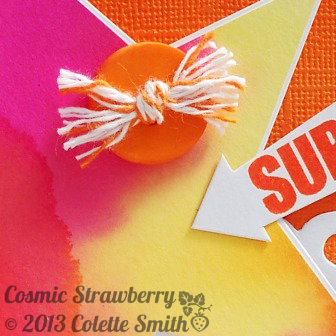
Super Star


Dream


For the full instructions on how to achieve the tie dyed look and create these lovelies, check out the current issue.


There was one more card not shown in the magazine, so here it is, with instructions :o)

Hi, Welcome, Hello


What you need...

Stamps: Hand Drawn Flower - Hero Arts
Card stock: yellow, white
Inks: Mowed Lawn, Squeezed Lemonade, Salty Ocean - Ranger Distress Re-inkers
Ink: Onyx Black - Versafine
Punch: corner rounder
Baker's twine: yellow
Button: white
Adhesives

What you do

Following the instructions in step 1 of 'Dream' in the magazine; Use Mowed Lawn, Salty Ocean and Squeezed Lemonade to create a tie dyed sheet of card. Stamp the drawn flower in black three times onto it. Cut out the flowers in layers, assemble with foam pads.

Cover a 12cm square blank with yellow card, round the right corners, wrap yellow twine around. Stamp or print simple words onto white card, trim into banners. Attach to the blank with the flower and a threaded button, as shown.
There is a fantastic subscription offer in this month's issue - an IndigoBlu stamping kit worth over £34.98! This is the gilding flake starter kit I used in the 7 Ways With Gilding project of the January issue.
Another excuse to get oh so messy! Sign up today and you'll soon be able to have a go at this amazing technique.
Don't forget to check out the Crafts Beautiful website for more projects, ideas and inspiration; along with free templates and downloads - you'll find the templates for the Super Star card on there too.
So, that's me for the nonce, I'll be back later with a sneaky peek at the current issue of PaperCrafter. Until then......xxx
post signature

Tuesday, 6 November 2012

Frosty!

Heevnin chums!
Hope you are all well! It's been a frantic couple of days but here I am.
This card I want to show you doesn't use stamps, just dry embossing and paper piecing.
So, I'd like you to meet Frosty!


What I used...

Winter Joy 12x12 Collection - Bo Bunny
Card stock - white, green, orange, black
Circle punches - various sizes
Snowflake punches - various sizes, styles
Alphabet stickers - black
Fine liner pens - white, black
Black Soot Distress Ink - Ranger
D'Vine Swirl embossing folder - Cuttlebug
Glitter dots

Emboss a square of white card, cover the top left corner with a curved piece of dotty paper.  Cut a piece of green card for the hat brim, ink the edges and adhere to the bottom of the dotty piece. Ink and draw faux stitching around the edges and mount onto black card.

Punch two black circles for the eyes, ten smaller ones for the mouth and a carrot shape out of orange card (ink the edge). Arrange and stick to the embossed panel, highlight in white.

Use alphabet stickers to spell 'Brrr!' in the bottom right hand corner of a white square blank. Punch snowflakes in different papers, arrange and adhere around the sentiment. Attach the panel to the top left of the blank, finish with a few glitter dots.

I think he's really cute. I based him on a Santa card I posted 6th January. There is something really satisfying about creating your own motifs and card toppers.

Okay, Simon's just brought me a brew, so I'll sign off and have a slurp. Thanks for calling in. Night night all! xx


Friday, 21 September 2012

Merry Diamonds

Good aft'noon peeps!
Time for another Christmas card. I made a few yesterday, but I've chosen this one to show today. A few years back I saw a card made with diamonds (the shape not the real thing). This gave me the inspiration for this card.


Several diamonds were cut from white, red and two shades of green card. I shuffled them around the front of a card blank until I was happy with the layout. After trimming, I inked the edges black (Ranger Distress Ink - Black Soot) and adhered them to the blank.

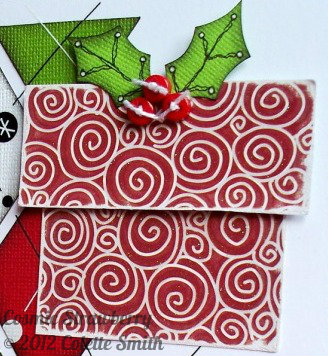
I rubbed on black and white lines (Sizzix Rub Ons - Background, Lines & Circles - 655095) and the sentiment (Pebbles Inc. Duplicates - 760269). Next, I made a present with two pieces of red glitter swirl paper (Kris Kringle Collection - Peppermint Swirl - S.E.I). Two holly leaves were sketched, cut out, edges inked and details doodled on.

The holly was adhered to the top of the present along with three tiny red buttons, threaded and tied with white cord. I doodled around the edge of the blank and attached the present to the top right corner.

I've just realised I've done another red/green Christmas card! So much for me not usually doing the traditional colours. Oh well.

Ok peeps, I'm signing off for now. Thanks for visiting and enjoy the rest of your Friday! xx