Showing posts with label Uni-ball. Show all posts

Saturday, 4 July 2020

I Wet My Plants

Hello there and happy Saturday!

I've been really busy of late with lots of work for the magazines, so I now have a bit of time to update my blog and share with you another cute make.

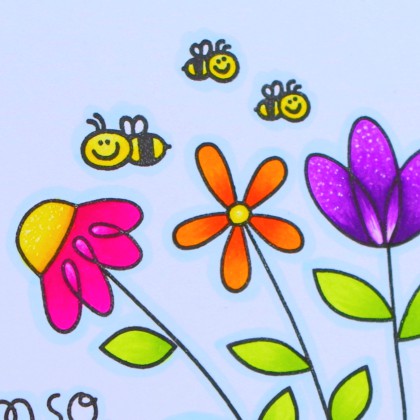
This one uses my fave, Paper Smooches! I teamed up Paper Smooches stamps with dies to create a lovely little scene with an adorable bear and some colourful flowers.

What you need...

Stamps:
Chubby Chum Pals - Paper Smooches
Twiggy Florets - Paper Smooches
Perky Plants

Dies:
Stitched - Paper Smooches

Copic:
Cerise R006
Fuchsia RV09
Lilac V04
Violet V09
Acid Yellow Y08
Lemon Yellow Y13
Pale Celestine B0000
Chrome Orange YR04
Cadmium Orange YR07
Toast E34
Chamois E35
Brick White E40
Pearl White E41

Ink pad:
Extreme Black - My Favorite Things

Gel pen:
White UM-153 Signo - Uni-ball

Card stock:
White
Lime

What you do...

1 Cut a piece of white card 10cm x 14cm, stamp three flowers and the sentiment from the Twiggy Florets set, some bees from the Perky Plants set and colour in.

2 Stamp the bear onto white card, colour in and cut out.

Die cut the curved stitches onto lime card, trim so it measures 10cm wide and approximately 4cm high. 

4 Attach the lime section below the plants and then adhere the bear in front of the plants with foam tape.

5 Adhere to a 10.5cm x 14.5cm white blank and add some detail to the plants with the white gel pen.

There you have it. I think the sentiment is hilarious. I bought the stamp set solely because of that one sentiment. Have you ever done that? Bought a stamp or die set just for one image or sentiment.

I hope you like this cute little make. I'm off now to go and sort the chickens out, they are after their afternoon corn!

Thank you for dropping by and hopefully back soon.


Saturday, 25 April 2020

Peas Love Happiness

Hello there!

Well I'm back with another make. I am still going through some of my old stamp sets and of course some of my faves are Paper Smooches. The 'Vegtastic' stamp set is just so cute, I used it in my last post with the carrot card. At least with this stamp set you are getting one of your five a day!

Without further ado do here we are...

What you need...

Stamps:
Vegtastic - Paper Smooches

Embossing folder:
Swiss Dots - Cricut

Ink pads:
Extreme Black - My Favorite Things
Sea Breeze - VersaMagic

Alcohol markers:
Nile Green G07, Apple Green G14, Green Bice YG01, New Leaf YG23, Sugared Almond Pink RV02, Tender Pink RV13 - Copic

Gel Pen:
Signo White Broad (UM-153) - Uni-ball

Dimensional medium:
Glossy Accents - Ranger

Card stock: 
White, Pale Aqua

Masking paper:
Stamping Mask Paper - Inkadinkado

What you do...

1 Stamp the peas onto white card stock with the little heart above. Stamp the images again onto masking paper and cut out. Lay the masks over the original stamped image.

2 Use a blending tool to blend the Sea Breeze ink around the images and remove the masks.

3 Colour in the images and add the sentiment underneath. Trim the image to 7.5cm square.

4 Emboss a 10cm square piece of white card with the Swiss Dots.

Cover a 12cm square blank with pale aqua card. Then layer the embossed panel followed by the stamped panel.

6 Add some highlights to the heart, pod and peas with gel pen, apply Glossy Accents and allow to dry.

I did notice that the Glossy Accents can affect the gel pen a little, so you need to be careful when applying it that you don't move it around too much, but you can't really notice on the card.

I still have quite a few rainbow themed cards to post up, but I'm trying to spread them out a little so you are not overloaded!

I'm going to sign off for now and have a coffee and maybe a shortbread or two (yum) whilst enjoying the sun in the conservatory. Plus I can see what the chickens are up to!

Thank you for popping by and I'll be back soon. Enjoy the rest of your weekend.


Thursday, 2 April 2020

Warp Speed

Good afternoon blog friends!

I hope you are all still keeping well, safe and not going too stir crazy.

Before I show you my card, I just want to say that for some reason Blogger has messed up the reply function to comments, this has been going on for quite a while with no real fixes. Apparently this is a big problem for lots of blogs, especially older ones. A suggestion was made that you could completely change the theme of your blog to overcome the problem. I am sure that I am not the only one who spent a lot of time and energy into creating their blog, so I don't really want to go down that route. 

I have got round it by not embedding the comment box and changing it so that it opens in a different window. As I can't reply I will leave a separate comment myself. Aaargh!

Righto, on to the important stuff. I do have a couple of more cards made using the Silhouette, but I did this one the other day and I am so excited to share it with you.


What you need...

Card stock: white
Stamp: Space Cadet - Paper Smooches
Ink pads: Sapphire - Avery Elle; Extreme Black - My Favorite Things
Copic: Pinkish White R00, Cherry White R000, Vermillion R08, New Leaf YG23, Nile Blue BG45, Cool Grey #1 C-1, Acacia Y04, Apricot YR16
Gel pen: Gelly Roll Stardust Clear #700 - Sakura; Signo Broad White UM-153 - Uni-ball
Masking paper: Stamp Masking Paper - Inkadinkado
Adhesives

What you do...

1 Hand cut a rough edged semi-circle of masking paper and attach to the bottom of white card 10cm x 14cm.

2 Stamp the images onto the card, stamp again onto masking paper, cut out and apply over each image.

3 Use the Sapphire ink and blend over the piece of card, leaving areas a little bit lighter.

4 Remove the masking paper and colour in the images.

5 Use the white gel pen to add stars and planets. 

6 Stamp the sentiment at the base in the semi-circle. Highlight the sentiment with the Stardust gel pen and some of the stars/planets.

7 Mat onto a 10.5cm x 14.5cm white blank.

I haven't made this card for anyone in particular. I am trying to do my makes using old supplies from my stash rather than keep purchasing new ones. This stamp set hasn't been used in a while and I thought the sentiment was perfect.

A thoroughly good time was had making this card and I'm really pleased with the way it turned out. 

The thing I love about Paper Smooches stamp sets is that they always have unusual, quirky and different wording/sentiments.

Thank you for popping by, keep well and I'll be back soon.


Thursday, 18 April 2019

Fishy Wishes

Hello blog friends!

I do hope that the weather where you are is as bright and sunny as it is here. It's so lovely to see all the plants and trees bursting open with colour.

Talking of colour, I have a fab colourful card with a fishy theme to show you. One of my favourite stamp sets is the That Bites by Avery Elle. I just find the faces of the fish so comical and the images lend themselves to male cards very well.


What you need...

Card stock: aqua, white
Stamps: That Bites - Avery Elle; Birthday Buddies - Paper Smooches
Copic: C1 Cool Grey 1, RV06 Cerise, YG13 Chartreuse, YR16 Apricot
Promarker: Purple
Ink pad: Extreme Black - My Favorite Things
Gel pens: Signo White UM-153 - Uni-ball, Glaze Clear #800 - Sakura
Dies: circle 8.5cm
Adhesives

What you do...

1 Stamp the fish over white card with black ink and colour in. Stamp the angler fish, colour in and cut out. Colour over the eyes with the clear glaze pen.

2 Die cut a circle in the centre of aqua card 12cm square.

3 Trim the fish panel to 10.5cm square and mat centrally onto a white blank 12.5cm square.

4 Mat the aqua panel onto the blank with foam tape.

5 Mount the angler fish at the lower left of the circle.

6 Stamp the sentiment in the top right and draw some bubbles with the white gel pen.

There you have it!  A bright, colourful card suitable for anyone of any age. 

I did use this stamp set in a previous post where I masked off the fish and inked the background. This made an effective, yet simple card. Here is the link to that post https://cosmicstrawberry-colette.blogspot.com/2018/04/that-bites.html

Thank you for dropping by, I hope you all have a lovely Easter!