Showing posts with label Hero Arts. Show all posts

Tuesday, 22 June 2021

Kitty Hug

Hi there!

It's been a few weeks since I last posted, but I'm back.

I have a friend, Lindsay who is a big cat fan and we met up a couple of weeks ago after not seeing each other for a couple of years. She had bought me the most adorable Winnie the Pooh mug and I wanted to make her a cat themed card to say how nice it as to catch up and thank her again for the mug.

I had recently purchased a cute cat stamp by Impression Obsession and decided it would be perfect for her card.


What you need...

Stamps:
Kitty Hug (D21359) - Impression Obsession
Dainty Swiss Dots - Altenew

Ink pads:
Onyx Black - Versafine

Patterned paper:
Into the Woods Remix 6x6 Petite Paper Pack - Lawn Fawn

Card stock:
Paradise - Hero Arts
Passionate Pink - Gina K Designs
White

Embellishments:
Black hemp cord

Extras:
Adhesives

Tools:
Big Shot - Sizzix

What you do...

1 Stamp the kitty three times, once onto Passionate Pink card, once onto white card and again onto the orange grid patterned paper.

2 Fussy cut the cat from the orange grid paper and the sign from white card. Layer onto the Passionate Pink layer. Fussy cut this out.

3 Stamp the Dainty Swiss Dots onto Paradise card. Trim to it measures 3¾" x 5½" (9.5cm x 14cm) and adhere centrally down a white blank 4¼" x 5½" (11cm x 14cm).

4 Wrap black hemp cord several times around the blank (under the kitty) and tie in a bow. 

I was trying to go for the pop art look with the style and colours on this one. I ended up snipping through the loops of the bow as I thought these looked a lot like whiskers. My cat Zuzu must have approved as she tried to rearrange them!

I really enjoyed playing with this cute stamp and the fussy cutting wasn't too difficult. This would look great coloured in with alcohol markers or watercolours to represent the colour of the recipients cat. Lindsay's cats aren't ginger, I just loved the patterned paper and thought it would work well the pop art look I was going for.

Lindsay loved it (as did her cats).

I am entering this card into the Anything Goes Challenge #422 over at Crafty Creations and the Creative Fingers Challenge #210 over at Creative Fingers.

Got to sign off, magazine projects to get on with. I'll be back soon with another card to share. Take care and thanks for popping by!


Sunday, 13 December 2020

Winter Christmas Trees

Hello friends!

I'm back with another card to share with you, this one being Christmas. This is a card I did for my Mum and was inspired by one that Jennifer McGuire created. It is a trifold card where the sides open outwards and uses a beautiful die set by Hero Arts.


What you need...

Dies: 
Winter Pine Fancy Dies - Hero Arts

Stamps:
Silent Night - Concord & 9th

Ink pads:
Chipped Sapphire - Tim Holtz Distress Oxide
Blueprint Sketch
Salty Ocean
Onyx Black - Versafine

Embellishments:
Glass Crystal Collection - Little Things from Lucy's Cards

Extras:
Sparkle Sheer Shimmer Craft Spray - Imagine Crafts
Crystal Clear Sparkle - Spectrum Noir
Titanium White Acrylic Ink - Amsterdam
Adhesives

What you do...

1 To make the trifold section, click here to see the project by Jennifer along with the instructions and measurements - she can explain it better than I ever could!

2 Set the assembled trifold section aside. Cut a piece of card 4¼" x 5½" and blend the three blue inks over the surface. Spritz with the Sparkle spray and use a paintbrush to flick white ink over the surface. Allow to dry.

3 Fix the inked panel to the back of the trifold section. 

4 Add some Crystal sparkle around the edges of the trees and add plenty of the Glass crystals. Stamp the sentiment on the back panel between the trees.

I'm so sorry that the photo doesn't do the card justice, plus it was difficult to position due to the nature of the blank. The best thing is my Mum loved it.

Jennifer did her card with a pink/red/purple background which looked stunning, but I thought I would stick to the traditional blue night sky.

I hope you like my little make and thank you so much for popping by. I'll be back soon with another, until then take care and keep safe.


Sunday, 9 August 2020

Rainbow Unicorn

Good afternoon blog friends!

I'm back with an adorable make using a stamp and die set that I have been itching to play with. I have had it some time, but a friend asked to make a card for her granddaughter's birthday. As she loves unicorns I thought this was the perfect set to use.
What you need...

Stamps:
Decorate A Cake Stamp Set (CM438) - Hero Arts

Dies:
Decorate A Cake Frame Cuts (D1741) - Hero Arts

Promarkers:
Fresh Bloom*
Magenta
Mandarin
Yellow
Lime Green
Cyan
Cool Aqua
Purple

*Limited Edition

Ink pad:
Obsidian Amalgam Ink Pad - Gina K

Sprinkles:
Let's Polka - Little Things From Lucy's Cards

Patterned paper:
Really Rainbow 6x6 Paper Pad - Lawn Fawn

Card stock:
White

Font:
Enjoy Writing - Khurasan

What you do...

1 Stamp the cake and add the eyes and icing. Stamp the flower cluster, the large flower, the horn and two ears.

2 Colour in the images and cut out using the coordinating dies. Assemble the cake.

3 Create an 11cm x 18cm white card blank. Cover the bottom 6cm with rainbow paper.

4 Print a sentiment, trim and fix to the rainbow section with foam pads. 

5 Attach the unicorn to the top of the blank and add sprinkles around the image.

The font that I used is for personal use only, I must point out that I do not make cards to sell and I did not charge my friend for this card, so the use of this font was for personal use. Free fonts are okay to use for personal use, however if you do sell your cards, then you will have to purchase a commercial use version. To access this and many more by Khurasan check out FontSpace  or dafont.com, 

I decided to go with a tall blank for this make. Tall cards seem to be making a come back at the moment, I remember when tall slim and DL sized card were all the rage. 

I was really pleased with how this card turned out. The photo doesn't really do it justice and it is so cute in 'real life'. Needless to say, my friend was very pleased with it.

Okay, I'm going to sign off for now. Enjoy the rest of your weekend and I'll be back soon.


Saturday, 18 April 2020

Sending Sunshine & Rainbows

Happy Saturday all!

I hope you are all well. 

I don't think I've ever been so pleased to see a rainy day. We haven't had rain for weeks here in Norfolk and our poor gardens are desperate. The grass in my garden at the back isn't the best most times, I can't even blame the chickens because it never really did well before I got them. It seems to go through phases where one year it's fab and the next pathetic. This year so far is pathetic and I think it's mostly down to no rain. Fingers crossed a day of rain will help.

I have a lovely card to share with you to counteract the dull, rainy day. This is one with a rainbow colour theme teamed up with a simple flower and sentiment. I then gave it a spritz of sparkle for that extra bit of zing. The background was created using dye inks by Wendy Vecchi, Tim Holtz and My Favorite Things.

What you need...

Ink pads:
Bluebird, Buttercup, Cactus Flower, Tiger Lily - Wendy Vecchi Make Art Blendable Dye Inks
Picked Raspberry Distress Ink - Tim Holtz (Ranger)
Sour Apple Hybrid Ink - My Favorite Things 
Onyx Black - Versafine

Stamps:
Small Striped Flower Cling Stamp (CG256) - Hero Arts 
Rainbow Greetings (CS124) - My Favorite Things

Copic:
Sky B24, Cerise RV04, Acid Yellow Y08, Celadon Green YG25, Apricot YR16, Lilac V04

Glitter spray:
Sparkle Sheer Shimmer Craft Spray - Imagine Crafts

Dimensional medium:
Glossy Accents - Ranger

Card stock: 
White

What you do...

1 On a piece of card stock approximately 10cm x 15cm start blending the inks from the top of the card.

2 Trim to 10cm x 14.5cm and spritz with the Sparkle spray allowing some heavy droplets form. When dry, mat centrally onto a 10.5cm x 14.5cm white blank.

3 Stamp the flower with the Onyx Black ink and heat set. Colour in the centre of the flower with the Copics. 

4 Cut out the flower and mat near the top of the blank with foam pads.

5 Stamp the sentiment under the flower with Onyx Black.

6 Apply Glossy Accents to the centre of the flower and add some dots around it on the blank. Allow to dry.

Even though I'm a Goth and my fave colour is black, I don't make dark or grungy cards. I love bright colours in my card making. Next to black my two other favourite colours are pool/aqua blue and lime green.

This card is so appropriate at the moment with the rainbow colour scheme, I think rainbows at the moment show a sign of optimism, hope, support and friendship. 

I do have some more rainbow cards that I have made and I will be posting these soon. 
I don't the photo does the 'sparkle' justice, you can see where some of the heavy drops are. It looks stunning in real life.

Thank you so much for stopping by, I do appreciate it. Take care and I will see you soon. 


Thursday, 14 June 2018

Floral Thank You

Hello lovelies!

I needed a simple and quick thank you card, so I decided to raid my stash and I came across a cling stamp that I've had for some time and not used (yes, I know, I'm naughty for doing that). 

I wanted to keep the card really simple with a Kraft blank and delicate white inking. I also decided to make the envelope too.


What you need...

Card stock: Kraft
Patterned paper: Darks Color Basics Paper Pad 12" x 12" - K&Company
Stamps: Small Striped Flower (CG256) - Hero Arts; Many Thanks - Paper Smooches
Dies: Labels Fancy #2 (with stamps - 657582) - Sizzix
Ink pad: Pure White Pigment Ink Pad - Avery Elle 
Envelope maker: Envelope Punch Board - WRMK
Gel pen: bright pink
Adhesives

What you do...

1 Create a top fold blank in Kraft card 8.5cm x 12.5cm.

2 Stamp the flower at the lower left corner making sure it goes off the edges. Stamp the sentiment in the top right corner. 

3 When the ink is dry, colour in the centre of the the flower with the gel pen.

4 Following the guide on the Envelope Punch Board, cut a piece of tan patterned paper, score, fold and stick to form the envelope.

5 Stamp the label in white ink onto Kraft card, use the coordinating die to cut it out. Stick centrally to the front of the envelope.

I think making your own envelopes is a great way to use up those papers that you like, but wouldn't use as a scrapbook page or add to a card. The Envelope Punch Board makes it so easy as it has practically every size you could want printed on the maker, plus it has the punch to cut out the indents where the score lines meet and one to round off the flap.

I really enjoyed making this little card, one tip I will give you is that the white pigment ink can smudge. I give a light squirt of hairspray to help fix it in place - it also makes the card smell nice!

Thank you for popping in and I'll be back soon - ta ta for now!


Monday, 14 May 2018

Magnificent Magnolia

Hi there lovely people!

I'm back with an elegant card featuring a beautiful magnolia. Our tree in the garden is clinging onto the last few flowers, it's a shame the flowers don't last longer. I'm still enjoying going through my craft stash and using stamps that I haven't used yet or haven't used in a long time.

This magnolia stamp I've had for a while, I think I grabbed it in a sale online.


What you need...

Stamps: Outline Magnolia (CG193) - Hero Arts; Sentiments Stamp (#10105761) - Bo Bunny
Card stock: white, pale pink
Embossing powder: Detail Clear - Stampendous
Ink pad: Onyx Black - Versafine
Copic: Begonia Pink (RV14), Macadamia Nut (YR30)
Promarker: Pale Pink
Gems: clear
Adhesives

What you do...

1 Cover a 12.5cm square blank with a 12cm square of pale pink card.

2 Stamp the magnolia onto white card and cover with the embossing powder, heat to melt.

3 Shade in the magnolia.

4 Cut out the magnolia and stick to the lower right of the blank, overlapping the bottom and right edges. Trim away the excess.

5 Stamp the sentiment in the top left corner. Add a few gems to finish.

I know that the magnolia stamp is no longer available, but this card would look lovely with any large outline flower stamp. I've got a few of these floral outline stamps from Hero Arts in various sizes. They make a beautiful simple and elegant card that is quick to make.

I'm going to say ta ta for now, thank you for stopping by!


Thursday, 7 September 2017

Cherish Christmas

Good afternoon lovelies!

I'm back with my first Christmas card (I've actually been making Christmas cards for the magazines since about May, but this is my personal first).

I've just finished illustrating and designing a cute little snowman card for an upcoming issue of PaperCrafter, but I can't say anymore than that at the moment.

Anyhoo, onto this make. As usual I've kept the style clean and simple, this card has a kraft base with a simple bauble.


What you need...

Stamps: Winter Sparkle CL798 - Hero Arts
Card: kraft
Ink pad: Onyx Black - Versafine
Baker's twine: red
Gems: red
White gel pen

I think the simple colour base and image give this card a cosy, Scandi feel. Looking on the Internet, you can still get this gorgeous stamp set.

I do have a few crocheted items that I've recently completed, so I may post pictures of those in the near future. In the meantime I've selected out a few goodies to make some more Christmas cards.

Thank you for popping by. TTFN!


Saturday, 20 December 2014

Fun & Funky Christmas Cards (Crafts Beautiful Nov 2012)

Good heevnin peepsicles!

Woohoo! It's nearly Christmas! Some of you may be still making last minute Christmas cards, so with this in mind I thought I would delve into the archives and show the fun slider cards I did for Crafts Beautiful for the November 2012 issue.


The templates for the Santa and the robin card can be downloaded from the Crafts Beautiful website (click here to take you to the page). The Rudolph card used Christmas Reindeer by Hero Arts and the Snowman card used a mix of Swanky Snowdudes by Paper Smooches and the Hero Arts Christmas Reindeer sets.

Slider cards are a lot of fun and are quite easy to make. Of course, you don't just have to stick to Christmas cards; I remember doing a robot set for CB and one of the cards had a moving robot. If you don't know how to make a slider card, please contact me and I will do a post with the instructions for you :o)

Don't forget there are lots more gorgeous templates, patterns and papers to be found on the Crafts Beautiful website. 

So! I'm going to say ta ta for now. I've got Christmas carols playing in the background, I need to light the fire and then I think I'll make a vat of mulled wine - bwah ha ha har!

Thank you for calling by and I'll be back later with another Christmas collection I did for a past issue of CB!

post signature

Friday, 31 October 2014

Cosmic Colours Challenge #7

Hello peeps!

It's time for a new Cosmic Colours Challenge...#7!

I've gone for a cosy Christmas palette this month.

Holiday Sparkle Design Seeds®
Here is what I've done using the colours...


The browns have come out a little more pink in the photo than what they really are, but hey ho!

I used one of my favourite Christmas stamp sets - Christmas Reindeer (CL540) by Hero Arts. I coloured the little cuties in with Promarkers, the snow is some ready embossed snowflake card I found at a local craft shop and I added some snowflake stickers to the sky. I finished it off with black pearls for the noses and a few gems on some of the snowflakes.

Of course, you are not committed to making a Christmas card, any occasion will do!

The creator of the winning card will receive some craft goodies and they can grab a Challenge Winner 'brag badge' to proudly display on their blog.

Three runner up cards will be chosen and they can grab the Challenge Top 3! 'brag badge' to proudly display on their blog.

There is also a 'play along' badge that you can grab if you wish. The codes can be found in the 'Cosmic Colours Challenge Badges' page.

The challenge will run until 30th November 2014 - 23:55 (GMT)


I can't wait to see what you come up with. I'll be back later with the winners from challenge #6! xx


post signature

Thursday, 12 December 2013

Dream

Hello peepsicles!
Hope you are all fit and well!
I would like to show you, if I may, a card I did back in October for my sister's birthday (I've only just discovered the photo I took of it - oops!).
It's a very simple card, but so pretty.


What you need...

Stamps: Large Flower (CG134) - Hero Arts; Life Sentiments - Kaisercraft
Ink pad: Cloud White - VersaMagic
Card stock: kraft
Pearls: pink

What you do...

Create a top fold kraft card and stamp the flower in the bottom left corner so that it overlaps the edges and the 'Dream' in the top right corner.

Embellish the centre of the flower and around the sentiment with a few pearls.

There you have it, a simple card that looks very elegant. Kraft card looks so boring on its own, but add a bit of colour and sparkle and it transforms into something wonderful.

I will leave you for now. I'd better go and check on the 'girls'. One of them is singing the 'egg song', so I'll go and collect my booty. I'm so proud of them :o}

Ta ta for now, thanks for visiting xxx

post signature

Sunday, 28 July 2013

Sending Love

Good morning my lovelies!
It's been a while I know. I have my niece Emily staying with me for a couple of weeks, and with getting commissions done before she arrived, I haven't had chance to make (or post) anything!
I've managed to sneak a few minutes this morning (Emily is still in bed) to show you a card I did way back when I started designing for Crafts Beautiful. It was my third issue (May 2011).
Without further ado do...


What you need...

Stamps: Psych Flowers Block, Round Designers Block - Judikins; Trees, Birds & Messages (CL182) - Hero Arts
Card stock: black, white, amethyst
Ink: Lilac, Amethyst, Boysenberry - Versacolor; Onyx Black - Versafine
Fine-liner: black
Gems: clear
Ribbon: purple
Adhesives

What you do...

Stamp a cluster of circles in Lilac, Amethyst and Boysenberry ink and over stamp with black flowers across the top of white card 9.5cm x 10cm. Stamp the sentiment in the bottom right corner.

Draw a stem from one of the flowers on the left and attach a tiny bow.

Mount onto the top left of black card 10cm x 10.5cm and then onto amethyst card 11cm x 11.5cm. Attach to the top left of a white 13cm square blank. Finish with a few gems.

I have always liked the set of cards. I think you can still get the Round Designers Block, I'm not sure about the flowers though, but any round outline flowers would work just as well. Experiment!

I'm going to sign off now. Thanks for calling by and hopefully I won't be as long in posting next time. xxx

post signature

Thursday, 9 May 2013

Crafts Beautiful June 2013 Issue

Whatcha peeps!

Hope you are all well. The weekend will soon be here...yay!

I have a couple of posts for you today, the first one showcasing may projects in the June issue of Crafts Beautiful.

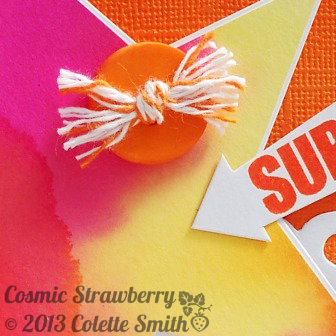
The theme is tie dye and I had great fun getting messy with inks. They are really bright colours, so the mess didn't look too bad - I just had technicolour hands.

Saying Hello


Super Star


Dream


For the full instructions on how to achieve the tie dyed look and create these lovelies, check out the current issue.


There was one more card not shown in the magazine, so here it is, with instructions :o)

Hi, Welcome, Hello


What you need...

Stamps: Hand Drawn Flower - Hero Arts
Card stock: yellow, white
Inks: Mowed Lawn, Squeezed Lemonade, Salty Ocean - Ranger Distress Re-inkers
Ink: Onyx Black - Versafine
Punch: corner rounder
Baker's twine: yellow
Button: white
Adhesives

What you do

Following the instructions in step 1 of 'Dream' in the magazine; Use Mowed Lawn, Salty Ocean and Squeezed Lemonade to create a tie dyed sheet of card. Stamp the drawn flower in black three times onto it. Cut out the flowers in layers, assemble with foam pads.

Cover a 12cm square blank with yellow card, round the right corners, wrap yellow twine around. Stamp or print simple words onto white card, trim into banners. Attach to the blank with the flower and a threaded button, as shown.
There is a fantastic subscription offer in this month's issue - an IndigoBlu stamping kit worth over £34.98! This is the gilding flake starter kit I used in the 7 Ways With Gilding project of the January issue.
Another excuse to get oh so messy! Sign up today and you'll soon be able to have a go at this amazing technique.
Don't forget to check out the Crafts Beautiful website for more projects, ideas and inspiration; along with free templates and downloads - you'll find the templates for the Super Star card on there too.
So, that's me for the nonce, I'll be back later with a sneaky peek at the current issue of PaperCrafter. Until then......xxx
post signature