Showing posts with label Marianne Design Creatables. Show all posts

Saturday, 9 August 2014

Hello Peachy!

Good afternoon peeps!

I'm sat here typing this whilst sat at my Mum's in Yorkshire. I brought Emily back after spending two weeks with Simon and I (hence the lack of posts). So I'm spending the weekend at Mum's. 

This morning I popped into Samuel Taylors at Embsay to say hello to Dawn (I met her through my blog), a very lovely and talented lady :o)

Today I thought I would show you a little card I did for an earlier issue of Crafts Beautiful.


What you need...

Dies: Labels Eight - Spellbinders; English Roses - Marianne Designs Creatables
Card stock: white, pale green, cream, mid peach, dark peach
Stamp: Chit Chat - Paper Smooches
Ink pad: Aloe Vera Dew Drop Chalk Pad - VersaMagic
Ribbon: pale green
Pearls: white, mid peach, dark peach

What you do...

Cover the bottom half of a 12cm blank with mid peach card. Die cut the second largest label in pale green card and the third largest in white card. With the labels in landscape, layer and fix to the blank so the points are in line with the top of the peach section.

Die cut and assemble three roses in cream, mid peach and dark peach. Attach to the bottom left of the label. Tie a bow in ribbon and stick just above the roses.

Stamp the 'hello' sentiment in Aloe Vera ink on the lower right of the label and add three pearls just above.

There we have it, a simple yet pretty card. I usually scrunch up the roses before assembly to give them a shabby chic look.

Why not pop on over to www.crafts-beautiful.com? There are loads of ideas, projects, inspiration and free downloads!

Before I go, don't forget to post your entries in the Cosmic Colours Challenge, the colours this month are adorable. Click here to take you to the challenge and rules of entry.

Well, I must go for now. Enjoy the rest of your weekend and I'll be back soon. Thanks for dropping by xx

post signature


Thursday, 8 August 2013

Martha Rose

Mewnin' chums!
Hope you are fit and well. Today I would like to show you a card that some friends commissioned me to make to give to their daughter Martha Rose for her Christening.


What you need...

Dies: Labels Eight - Spellbinders; Chinese Roses, English Roses - Marianne Design Creatables
Punches: Pointed Butterflies 3/8", 5/8", 1" - X-Cut
Card stock: white, lime, pink (pale/mid/dark)
Ink pad: Orchid - Versacolor
Seam binding: white
Decorative pin: white
Crystal: clear
Adhesives
Computer & printer
Font: Italiano

What you do...

Print the sentiment onto white card. Die cut a large label in pale pink and the sentiment with a smaller label. Mount onto the lower left of an A5 landscape blank.

Die cut three leaves from the English Roses set in lime card, a large Chinese rose in dark pink and one in mid pink and a small rose in white. Ink the edges of the small rose with Orchid ink. Scrunch up the leaves and roses and assemble. Arrange and stick to the lower left of the sentiment panel.

Make a bow using two lengths of seam binding, push a pin through the knot and glue to the top of the roses.

Punch two large, one medium and two small butterflies in white card, repeat with shades of pink. Fold back the wings of the pink butterflies and attach to the white ones so the wings stand up. Adhere to the blank. Embellish with a few crystals to finish.

I wanted to keep the card simple, clean and elegant, using only a few colours. I think it looks really fresh and pretty. Martha's parents love it (phew).

I'm in the process of making our card to give to Martha, so I'll be back later to show you.
Thanks for popping by xxx

post signature

Sunday, 28 April 2013

Delightful! & retrosketches #59

Hello peeps!
Hope you are all having a wonderful weekend. We're still working hard at the hall/landing refurb and decoration (there is a long way to go yet...and a lot of mess) but I managed to find time to squeeze in this little card yesterday. I took my inspiration from retrosketches #59.


 Here is my take on it....


What you need...

Papers and stickers: Sweet Day Collection Kit - Echo Park
Card stock: red, orange, brown
Dies: Chinese Roses - Marianne Design Creatables
Adhesives

What you do...

Create a 13cm x 15cm blank. Cut a pennant 6.5cm x 9cm in chevron paper. Cut a smaller pennant 5cm x 7cm in spotty paper and adhere centrally to the larger one. Cut a 6.5cm piece of the scallop sticker border and fix to the top of the pennants. Add the 'Delightful!' sticker across the centre.

Attach the pennant to the centre of the blank. Die cut three roses, one in red, orange and brown. Scrunch and assemble. Glue to the top of the pennant.

This is such a sweet and simple card. Head on over to the retrosketches blog for lots more layouts and inspiration. A new sketch is released every Saturday. You have until 11.59pm (central time) on the following Friday to enter into the retrosketches challenge to win the ROCKstar badge to proudly display on your blog. Runners up are given a SHOUTout badge.

Saying that, I haven't entered any challenges myself yet. I should really - naughty Colette!

Just a bit of daft now. I was taking a piccy of my card in the conservatory and Bazoo was sat on the sofa having a wash (sitting in her usual dignified manner - showing all her tummy fluff). I turned round to take a snap of her, interrupted her ablutions and captured her face in mid wash. Hilarious! She doesn't look impressed though. Bwa ha ha ha!


Then she got interrupted by a wood pigeon on the roof.


Just look at that lovely fluffy tummy - oooooh!

Okay, that's enough silliness and twaddle from me. Enjoy the rest of your weekend and thanks for popping by xxxx

post signature

Tuesday, 23 April 2013

Adam Ant & Celebrate Sunshine

Heevin' me lovelies! 
Hope you all had a fab weekend. I know I did. Simon and I went to see the one and only, the fantastic, talented and still totally gorgeous Adam Ant on Sunday evening. He was absolutely mind blowing and such a great showman. I got a t-shirt, a signed copy of his new album and a few other goodies. I'm still buzzing!


I've been catching up on the gardening and a few other jobs whilst the weather has been so lovely. I managed to get some more commissions sent off. Hopefully I will get to do a couple of cards before I start on the next lot.

For now, here's one I made for the January issue of Crafts Beautiful. Enjoy :o)


What you need...
Papers: Amy Tangerine Sketchbook 6x6 Paper Pad - American Crafts
Stamps: Dear Lizzy Warble - American Crafts
Dies: Chinese Roses - Marianne Design Creatables; On the Edge Scallops - Sizzix
An unused book
Netting: cream
Ink: Onyx Black - Versafine
Seam binding: cream
Baker's twine: pink
Button: turquoise
Stick pin: pearl
Flat backed pearls: pink
Adhesives
What you do...
Cover a 12cm square blank with ledger paper. Die cut one small and two large roses from a book page. Hand cut three leaves in pink paper and scrunch.
Adhere to the right side of turquoise paper 4.5cm x 8cm. Die cut a scallop border in green spotty paper; attach this along with the turquoise piece to the lower right of the blank.
Wrap and tie twine around the card. Thread the button with twine, tie around a stickpin, a small piece of netting and a length of binding. Glue to the blank just under the roses. Stamp the embellishment above the rose panel to the left, finish with a few pearls.
I think this is one of my fave cards of all time, even though I had to cut up a book :o(

Being ex-library it took a lot of courage. I bought a copy of Far From The Madding Crowd, one of my favourite books. It was a new paperback, but only a couple of pounds. it was still hard to chop into; better than cutting into my much loved hardback copy.
You could photocopy a page on both sides and age it with tea, but you don't seem to get the same effect unfortunately.
I did three other cards for this project, one of which is a cute kite with a tail made from baker's twine. You can download the template for the kite card from the Crafts Beautiful website. For a look at the whole set of four, check out my post Crafts Beautiful January 2013 - Pt 3.
On checking t'internet, you can still get the lovely Warble stamp set from A Trip Down Memory Lane.
Well, it's getting late, so I'll say toodle pip for now. Thanks for dropping by! xxx 

post signature

Saturday, 2 March 2013

Just For You

What'cha peeps!

Hope you are all well on this bright and sunny day.

Simon is busy doing some d.i.y and Bazoo is asleep somewhere. No doubt she will come up soon and do the 'Hypno-cat' thing. Her alter-ego appears when she wants feeding or wants attention, so she sits there, not moving, not blinking, not making a sound or anything and you can 'feel' the laser eyes boring into you.

The worst is when you are preparing the evening meal or making a brew and she goes and sits by her bowl. Zzzzzzzz! Laser eyes burning in your back. Hypno-cat strikes again. It's very unnerving.

Well, enough dribble, I mean drivvle. Onto the important stuff...

This card I'd like to show you is one I made for a lovely lady called Joyce. We see Joyce and her adorable hubby John when we go to The Vernon for a meal on a Friday night. It is her birthday tomorrow, so Happy Birthday Joyce!


What you need...

Stamps: sentiment
Papers: Infuse 6x6 pad - Basic Grey
Dies: Framelits Fancy Labels #4 -  Sizzix; Chinese Roses - Marianne Design Creatables
Ink: Onyx Black - Versafine
Card stock: white
Seam binding: Walnut
Stick pin: decorative pearl
Flat backed pearls
Adhesives

What you do...

Wrap a double length of seam binding around a top fold 13cm square blank and tie in a bow on the left edge. Die cut a label in olive green paper, and a smaller one in patterned paper. Mount onto the card, over the binding.

Stamp the sentiment onto white card. Cut out with a label die, mount centrally onto the other labels. Die cut two large roses and a small one in co-ordinating patterned paper. Make up and glue to the left of the label, under the bow. Die cut two leaves in olive paper and also attach these to the card. Finish with a decorative pin and a few pearls.

You may recognise this card from a previous post. I loved the layout so much I did it again, but with different papers this time.

I also made Joyce a shabby chic fabric flower brooch.


What you need...

Fabric: small ditzy floral, blue dotty
Netting: pink, white
Felt: pink
Dies: Bloom Nesting Dies - X-Cut
Brooch pin
Fabric Glue
Self cover button
Sewing cotton: white, pink

What you do...

Die cut three different sized flowers, twice in the floral fabric and one of each colour of net. Sandwich the net between the same sized flowers then layer. Secure with a couple of stitches in the centre.

Cover the button with blue dotty fabric and sew to the centre of the flower. Cut a circle in pink felt and attach the brooch pin with pink thread. Glue to the back of the flower, allowing the glue to penetrate the felt. This will create a rigid back and help support the flower. Ta da!

Don't worry about the petals fraying, this all adds to the ol' shabby chic feel.

I adore these big flowery brooches, they always look good pinned onto a plain jacket or coat and are so easy to make. I'm a sucker for buying fat quarters, always with 'Ooooh! That would make a good brooch'. I have enough to make hundreds - oops.

Joyce loved the card and brooch - whoopee!!

Phew! It's been a long post, but I think I owe you after my short absence. Before I say ta ta, I want to thank you for all your kind comments about my makes and the blog candy. I love visiting your blogs and seeing your wonderful creations. Good luck to all those who have entered the March giveaway.

So long for now. xxx


Tuesday, 29 January 2013

Thoughts of You

Welcome chums!

How are you today? It's wet & windy here in North Norfolk. The wind was really bad last night, the weather was really windy too - ha ha ha ha! I know NOT funny.

Ahem.... Moving swiftly on. This creation took me ages to get it just as I pictured it in my head. See if you can guess what my inspiration was!


What you need...

Stamps: Word Up - Paper Smooches
Dies: Labels, Fancy #4 (657913) Framelits - Sizzix; Carousel Bird Cage - Poppystamps; Small Bird Branch, Chinese Roses - Marianne Design Creatables
Patterned paper: aqua, white, black
Card stock: aqua, white, black
Ink: Onyx Black - Versafine
Seam binding: black
Adhesives

What you do...

Create a 12cm x 15cm blank. Die cut the largest rose in three different papers, the largest label in aqua, the birdcage, bird and two leaves in black card.

Attach the bird and the cage to the label so it sits centrally. Trim a small section from the left side of the label.  Wrap seam binding around the card and tie in a bow. Adhere the label to the left edge of the blank.

Scrunch the roses and leaves and assemble. Attach to the card just under the bow. Snip a small thin strip of black card and fix to the top of the blank in line with the top of the cage. Stamp the sentiment in the top right corner.

Did you guess where I got my inspiration from? Aye! It's me very own ye olde blogge design! I just love these colours together, it looks so fresh. I think the aqua label really makes the birdcage pop.

This would make a good sympathy, get well or 'just to let you know I am thinking of you' card.

So, that is all from me for the mo. Thanks for popping in. xxx


Thursday, 17 January 2013

You Make Me Smile!

Howdy peepsicles!

This is my 100th post!!! Whoopee! OK, that's the excitement over for today.

I would like to show you a card that I did last night. No occasion. The layout, colours and so on, just popped into my head. So I made it :) Here it is...


What you need...

Stamps: Labels, Fancy #2 Framelits Die & Stamp Set (657582) - Sizzix/Hero Arts
Dies: Labels, Fancy #4 Framelits (657913) - Sizzix; Chinese Rose - Marianne Design Creatables
Paper: Blissful 6 x 6 Bundle - Authentique
Card stock: white, pale yellow
Ink: Onyx Black - Versafine
Seam binding: Walnut
Decorative stick pin
Pearls
Adhesives

What you do...

Wrap a double length of seam binding around a top fold 12cm square blank and tie in a bow on the left edge. Die cut a label in pale yellow card, and a smaller one in patterned paper. Mount onto the card, over the binding.

Stamp the sentiment onto white card. Cut out with a label die, mount centrally onto the other labels. Die cut two large roses and a small one in co-ordinating patterned paper. Make up and glue to the left of the label, under the bow. Die cut two leaves in pale yellow card and also attach these to the card. Finish with a decorative pin and a few pearls.

I'm really pleased with this card. It turned out just as I imagined and I didn't have to fiddle around for ages getting it just right. Sometimes you have an idea in your head and it just won't work out on the card. So frustrating, especially if you've spent hours choosing colours and arranging stuff only to abandon it. Grrr!

Hope you like. Thanks for looking. xxx

Monday, 8 October 2012

Joy!

Aft'noon peeps!
Here I am again with another Christmas card. This one was inspired by a project by the fabulous Pete Hughes (from Sizzix) in the current issue of Papercraft Inspirations (Issue 105 - Nov 2012). I have put my own take on it, using a die cut mistletoe branch, 'Joy' phrase, snowflake and scalloped borders instead of Pete's branch, 'Noel' phrase and lacy edges. Plus, I fixed my bauble to the card front, where Pete had left his to dangle so it could be removed and used as a tree ornament.
So here it is....


What I used.....

Carved Ornaments - Movers & Shapers - Sizzix
Joy - Movers & Shapers - Sizzix
Scallops - On the Edge - Sizzix
Snow Flurries - On the Edge - Sizzix
Mistletoe - Marianne D Creatables
Aspen Frost 6x6 Paper Pad - Basic Grey
Green Card
Baker's Twine - Red
Pearls - Flat Backed

I die cut two baubles, one in patterned paper and one in green card, and another in red patterned paper with the 'Joy' die inserted. They were then layered up, and the red bauble was mounted with foam pads. I snipped the top off the green bauble and stuck it to the top of the red. I tied baker's twine around the top.

A scallop border and a snowflake border were cut in patterned paper. These were adhered to a white blank along with a wide strip of co-ordinating paper. I die cut a mistletoe sprig in green card, distressed and embellished it with pearls. This was then adhered to the card along with the bauble. Ta da!

I must say I do love Pete's creations. Whenever I see his projects in magazines I always 'ooh' & 'ahh' along with, 'got to have a go at that'.

Enjoy the rest of your Monday! Thanks for calling by. xxx

Friday, 1 June 2012

Roses, a Monster and Herb!

Hello Chums!

I know, I know, two posts in one week! Wow, I must be on a roll. This one's a whopper too, with two cards and loads of piccies - whay!

Straight down to it then, the first card is a birthday card for a very dear and close friend, June. I designed this with her in mind, and I'm sure she will like it.


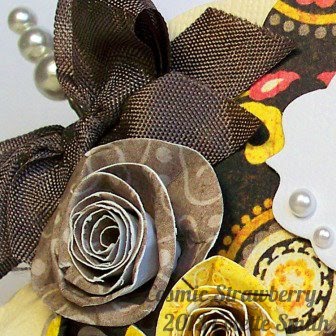
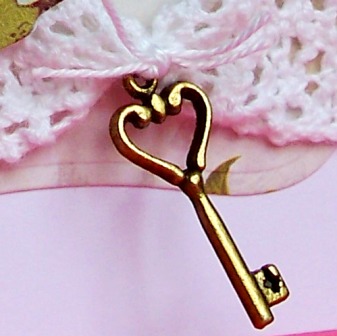
I made the three roses using the English Rose dies by Marianne Design Creatables, the roses and all the other paper elements were made using the Madeline 6x6 pad by Prima. The top note label behind the roses was cut using a die from the Spellbinders Nestabilities Labels One set. A length of cotton crochet lace, a pearl gem, a rub-on sentiment and an antique key were used to finish the card. Here are some close ups (getting all arty now with the 'ol photography).


I scrunched up the paper after die cutting the roses, then after rolling up, I bent the petals to give them a more aged, shabby chic look.


The butterflies were cut out of a butterfly design paper, I then layered them up, bending the wings slightly and finished with a pearl gem


I saw a pack of these darling antique keys by Creative Expressions and HAD to have.


Right, on to the next card, which is a stark contrast to the one above. This is for a young male relative (though it could work for the bigger boys). I thought all boys love monsters and instead of doing the usual trains, cars etc .....  a monster it will be!


The papers and journaling sprouts are from the Jillibean Soup Monster Stew collection and the sentiment is from the Hero Arts Monster Fun stamp set. After stamping the sentiment onto white card, I punched it out using a circle punch and mounted it onto one of the journaling sprouts, I then arranged it with a couple of more sprouts and attached to the front of a square black card blank. I hand cut some stars and an arrow, mounted them onto black card and then fixed them to the card, finally finishing with some purple twine wrapped and knotted on the left side.


Here are some more close ups....


On the inside, I created a simple sentiment, using die cut scallop circles (to mirror the monster sprout on the front) a rub-on and a scattering of hand cut stars. Ta da!!


Now then, you're probably wondering who Herb is. Well this is where we get silly. I was up at the local farm shop last week and I was picking some tomatoes and I came across this one......


.....well, I had to get it didn't I? So then, I put some googly eyes on it (I need to get out more methinks).


Looks good, but I don't know, not sure about the toupee and the eyes seem a bit wide, so I removed the toupee and turned him over, repositioned the 'ol eyes.....


.....that's better. He looks like a Herb, so that's what I've called him. I think he's really cute. Though he's still sat in our fridge, going a bit mushy now :( Oh well, he had a happy, if short life........................might be still edible. I'll put him in a ham sarnie for Simon tomorrow, bwa ha ha hah!

Enough silliness for today, I'm off now for a well deserved coffee, and a chocolate digestive mmmmm. Have a great weekend, will post back soon. Colette xx