Showing posts with label Memento. Show all posts

Tuesday, 3 August 2021

Celebration Cake

Hello there!

I'm back with another card to share with you. This one is a fun cake card done in lovely summer sorbet shades.

I found that I didn't have any colours of card stock in the shades I had in mind. I solved this by creating my own with Promarkers. I haven't used my Promarkers for a while, so I thought I would dust them off and get them used.

Even though I have the full range of Copic markers, I find that sometimes they don't have the exact colour I'm looking for. This is where Promarkers come in, they have some beautiful colours, especially the pastel and sorbet shades. So why not mix the two brands?

This is a simple stamped image on a large white banner. I made the coloured background by die cutting strips of white card, shading them in and then arranging them onto some copy paper and sticking down. This was then cut in a panel.


What you need...

Stamps:
Birthday Bash - Paper Smooches

Dies:
Horizontal Stripes - Waffle Flower
A2 Layers
Scalloped Banner Set - Avery Elle

Ink pads:
Tuxedo Black - Memento

Alcohol markers:
Pink Carnation - Promarkers
Peach
Lime Green
Pastel Green

Embellishments:
Crystal Collection-Glass - Little Thing's from Lucy's Cards

Card stock:
White

Extras:
Adhesives
Crystal Clear Shimmer Pen

Tools:
Big Shot - Sizzix

What you do...

1 Die cut the horizontal stripes in white card. Use Promarkers to colour the stripes in the four colours that you want to arrange them.

2 Add double sided adhesive to a piece of white copy/scrap paper and stick down the stripes. Die cut into a panel using the 3¾" x 5" die from the A2 Layers set. 

3 Stamp the cake onto white card with the sentiment lined up underneath. Colour in using Promarkers.

4 Use the pinpoint border banner to cut out the cake image. 

5 Create a 4¼" x 5½" white blank. Mat the striped panel onto it. Add the banner with foam tape. Embellish with some of the Glass gems and highlight the icing on the cake with shimmer pen.

I used one of my old Paper Smooches stamp sets here, but there are so many cute cake stamps on the market along with some adorable sentiments. Use what ever you have in your stash.

This card layout would look good for a lot of occasions. Done in masculine colours with a male oriented image/motif/sentiment would be great. I think I might do a Christmas version.

Sadly I didn't get round to starting my Christmas cards in July. Magazine work always gets hectic at this time of year as deadlines are tighter to get in the extra issue. Hopefully I should be able to get going with the Christmas cards soon. Watch this space as they say.

Just before I go, I just want to mention that as Feedburner no longer supports email subscriptions, I have changed over to follow.it. This means your notification email will look slightly different, but it still does the same job of notifying you when I upload a new post.

If you have a blog that used Feedburner and haven't changed over to a new email subscription service I can highly recommend follow.it. They had reached out to me, but I had already considered using them anyway. It was so easy to set up and the support is great. Click here to find out more.

Thank you for stopping by, I do appreciate it. See you soon!


Thursday, 20 May 2021

Balloon Celebration

Good afternoon!

I hope you are all well. Sorry I haven't posted sooner, but I have quite a few magazine projects to get in before the deadlines. Can you believe I am designing for Halloween and Christmas? Yipes!

Moving away from halloween and Christmas, I have a lovely, bright card to share with you today perfect for a celebration or birthday and it features balloons!

I've used a lovely rainbow palette and the techniques used are ink blending, stamping, die cutting and layering.

Here it is...


What you need...

Stamps:
Birthday Bash - Paper Smooches
You Said It - Doodlebug Designs

Dies:
A2 Layers - Waffle Flower
Say Cheese, Again - Lawn Fawn

Ink pads:
It's a Girl - Catherine Pooler
Garden Party
Pixie Dust
Cantaloupe - Memento
Buttercup Make Art - Wendy Vecchi
Garden Patina
Onyx Black - Versafine

Embellishments:
Pearls Glossy Porcelain Mix - Little Things from Lucy's Cards

Card stock:
White

Extras:
Sparkle Crystal Clear Shimmer Pen
Adhesives

Tools:
Big Shot - Sizzix
Blending tools

What you do...

1 Die cut the large photo frame from white card. Cut a panel of white card slightly smaller than the frame.

2 Blend Garden Patina ink at the bottom of the card panel fading to white.

3 Use the aperture of the frame as a guide and stamp the trio of  balloons twice. Use the solid balloon stamp to fill in the colours. Stamp dots above each balloon in the same colours.

4 Die cut the 3¾" x 5" layer in white card and blend the six colours in rainbow order.

5 Mat the rainbow panel onto a card blank 4¼" x 5½". Attach the balloon panel centrally at the top.

6 Stamp the 'Celebration' in black ink across the base of the photo frame and attach to the blank with foam tape, making sure it lines up over the balloon panel. 

7 Add some shimmer to each of the balloons and add some pearls to the blank.

Even though I do use some new products, I am trying to use some of my older stash too, hence the Paper Smooches and Doodlebug stamp sets. Of course you can use any balloon themed stamps in your stash to re-create this card. 

Top tip: If you don't have any balloon stamps, but you have solid balloon dies, cut balloons from foam sheets. Attach to an acrylic block/stamp platform with glue stick or double sided tape, apply ink and stamp!

I have used the A2 Layers die set which is measured in inches. The metric equivalent of the rainbow panel is approximately 9.5cm x 12.5cm and the blank is 11cm x 14cm.

I hope you like this pretty, cheerful card. You can of course change the colours for a card suited to a male recipient.

Thank you for popping by and I'll be back soon.


Tuesday, 30 March 2021

If You Were Milk - Snarky Cat

Hello there!

I'm back with another card. This one is very quirky and snarky. I have used the oh so funny Snarky Cats by Tim Holtz. The cat I used in this one went perfectly with the sentiment, its face says it all.


What you need...

Stamps:
Tim Holtz Snarky Cats (CMS392) - Stampers Anonymous

Stencil:
Circle Extraordinaire (ST-122) - My Favorite Things

Ink pads:
Dried Marigold - Tim Holtz Distress
Squeezed Lemonade
Twisted Citron
Tuxedo Black - Memento

Embellishments:
Midnight Mix Sequins - Little Things from Lucy's Cards

Washi tape:
Black/white houndstooth - MT

Card stock:
white

Extras:
Adhesives
Masking paper - Inkadinkado

What you do...

1 Cut a piece of white card stock 4"x 5¼" (10.5cm x 13.5cm) and position the stencil so it sits central. Use the stencil to get an idea where you want the cat to go. 

2 Ink up the cat and stamp so it sits near the lower right corner. Stamp the cat again onto some masking paper and fussy cut out. Place over the original cat.

3 Replace the stencil and blend the inks, starting with Dried Marigold followed by Squeezed Lemonade and finishing with Twisted Citron. Remove the masking paper.

4 Add a strip of Washi tape across the bottom of the panel so it lies at an angle and immediately under the cat.

5 Stamp the sentiment at the top left of the circle.

6 Mat the panel onto a white 4¼"x 5½" (11cm x 14cm) top fold blank. Add some black sequins to decorate.

I always use a quick drying dye ink to stamp the image onto the card panel and masking paper otherwise it can smudge when you ink blend over it. If you have a stamping platform, keep the cat stamp on the platform and after removing the mask, stamp over the cat with a crisp, rich ink such as Onyx Black by Versafine. This will really make the original stamped image pop with the risk of smudging.

Sometimes if you don't use a quick drying dye ink on the original image, the masking paper can pick up some of the ink and transfer it onto your card panel if you have to reposition it. Not good.

I hope you like my snarky little card, I have the Christmas version too, so I'm looking forward to playing with that one.

As always, thank you for stopping by and take care. 

Sunday, 4 March 2018

Snow Happy!

Hello there peeps!

As you may know, I'm trying to make a stock of Christmas cards throughout the year, as I always run out of time when it gets nearer to Christmas.

There is a cute little stamp that I've had for a couple of years and have never got round to using it (I can't be the only one who buys stamps when they see them in case they run out of stock/get discontinued).


What you need...

Stamps: Frostier (KS207) - Stamping Bella; Believe in the Magic (CD001) - Your Next Stamp
Patterned Paper: Sugar Plum 6x6 Paper Pad - My Mind's Eye
Ink pad: Tuxedo Black - Memento
Alcohol markers: Copics
Coloured Pencils: Polychromos - Faber-Castell
Ribbon

I coloured the base colour on the image with Copics and then added the shading and highlights with pencils and blended. I tried to match the colours of the image with the beautiful colours of the paper.

I hope you like this cute little card, I  thought the snow was apt after the weather we've had lately!

Thank you for stopping by, see you soon! x


Sunday, 4 February 2018

Christmas Houses

Hallo peeps!

I'm back with another Christmas make. I've done a lovely snowy Christmas night scene with cute houses in a row. It's a long narrow card that measures 7cm x 15cm with a side fold. 


What you need...

Stamps: Snowman Street (10001135) - Artemio; Merry Christmas sentiment
Ink pad: Tuxedo Black - Memento
Copic Markers
Baker's Twine: red

I bought this stamp set in a sale from a craft shop. On browsing the internet, there are still a few sets out there. The set not only has this adorable row of houses, but some really cute snowmen too. I'll insert a picture below.


I love doing unusual sized cards, it is the perfect excuse to make envelopes and use up some of the lovely Christmas papers I have in my stash.

Hopefully I will get time to make some more Christmas cards. I was looking through my stamps and dies the other day and there are so many ideas popping into my head!

I'm going to sign off now, thank you for popping by and I'll be back soon. TTFN! x


Wednesday, 24 January 2018

Loopy Christmas

Hello there lovelies!

As I stated in my last post, I want to challenge myself to try an do at least one Christmas card per week. I have done a couple, but haven't had chance to post them up. 

For the first one, I purchased an adorable set of stamps featuring animals in hats. It also has a fancy frame stamp so that you can set the animals in the frame and a sentiment in the banner.


What you need...

Stamps: Season's Greeting - Lil' Inker Designs
Ink pad: Tuxedo Black - Memento
Alcohol markers: Copic
Card: pale pink, pale blue
Dies: Christmas Trims #2 (659913) - Sizzix Thinlits

I've checked the internet, the dies and the stamps set are still available - woohoo!

I hope you like my little make, thanks for stopping by and see you soon! x


Saturday, 15 August 2015

Blah Blah Blah...

Happy Saturday peeps!

I actually managed to go for a bike ride this morning and have a cup of tea with the 'girls' (my chickens) in the garden. That sounds like I did the bike ride and have the tea at the same time! Noooo, bike ride first, tea after -lol!

Anyhoo, it was Joolz 50th birthday during the week, (Joolz runs the Zumba classes) and it was her party last Saturday. I decided to use one of my fave stamp sets for her card, Tim Holtz's Bird Crazy. Here is the result!


Items needed...

Stamps: Bird Crazy by Tim Holtz (CMS212) - Stampers Anonymous; Blah Blah (UMG1664) - Art Impressions
Card stock: white
Ink pad: Tuxedo Black - Memento
Promarkers: Amber, Bright Green, Canary, Cerise, Frosted Jade*, Ice Grey 1, Lime Green, Magenta, Oasis*
Baker's twine: black

I love this set, as it is great to use on cards for both men and women. I did add the sentiment 'Happy birthday you old bird' inside the card. The stamp was taken from the Inkadinkado set called Bird Assortment.

I hope you like my little make, thank you for calling by. Enjoy the rest of your weekend! xx

post signature

Wednesday, 17 September 2014

Warm Wishes - Crafts Beautiful Oct 2014 Issue

Good afternoon my lovelies!

It's very autumnal here in Norfolk today. Still mild, but there is that lovely mist in the air that you only get in the autumn :o)

Anyhoo, I have the second card from the October issue of Crafts Beautiful to show you. The projects feature paper/card piecing.


What you need...

My lovely, cosy templates: Crafts Beautiful
Textured card stock: textured aqua, cream, chocolate brown, pale aqua, pale pink
Ink pad: Rich Cocoa - Memento
Blending tool: Inkssentials - Ranger
Punch - corner rounder
Gems: clear
Lettering: Basic Grey
Baker's twine: pink, brown
Adhesives

What you do...

Use the templates to cut out a pale aqua mug and handle, an aqua inner, a pink snowflake and cream steam.
Ink the edges of each with Rich Cocoa ink, then assemble straight onto chocolate brown card and trim to leave a narrow border.
Round the top right corner of a white A6 blank.
Cut a slightly smaller section of pale pink card, round the top right corner, ink the edges and attach to the blank.
Use foam pads to mount the mug onto the blank.
Add lettering to make a sentiment in the top right. 
Wrap and tie pink and brown twine around the spine and add a few gems to finish.

Ta dah!

Ooh! It makes you want a lovely mug of hot steamy cocoa.

Craft tip!!! I used some cream lettering from a sheet of alphabet stickers by Basic Grey. I then coloured them in with a brown Promarker. Great if you want to match up your colours.

The templates are in the back of the October issue or you can download them free from the Crafts Beautiful website. You will need to register to download templates, patterns and papers, but it quick, easy and free to do. There are loads of projects and ideas on the web site.

Just before I go, the new Christmas Special issue will be hitting the shops on Friday. I have a lovely snowflake paper cutting master class, 3D bauble cards and I'm featured in the 'Ask the Expert' pages on how to cut out circles by hand and what triple stamping is. 

Ooh! Get me! Colette (I am a fountain of knowledge) Smith. Bwah har!

Anyway peeps. I have to sign off for now, but I'll be back. Toodle-pip! xx

post signature

Thursday, 11 September 2014

Cosy Christmas - Crafts Beautiful October 2014

Hello peeps! Happy Thursday to you!

As some of you may or may not know, I have regular monthly projects in Crafts Beautiful magazine. 

This month I have a heat embossing master class and a two card project featuring simple paper (or card) piecing. It is one of the paper piecing cards that I would like to share with you today.

I decided to come up with a warm and cosy theme using lovely ice-cream colours, and here it is...


What you need...

Textured card stock: chocolate brown, cream, pale aqua, pale pink, peppermint green
Ink pad: Rich Cocoa - Memento
Lettering: Basic Grey, brown
Baker's Twine: green
Gems: clear
Punch: corner rounder
Tool: Inkssentials Ink Blending Tool - Ranger
Adhesives
Templates: Available to download from Crafts Beautiful

What you do...

If you have the magazine, copy the templates from the pattern pages or log on to the Crafts Beautiful website and download.
Create two pale pink mittens, two pale aqua cuffs and two peppermint green trees. 
Colour the edges of each piece with Rich Cocoa, leave to dry and assemble.
Round the corners of cream card, 10cm x 13cm and pale aqua card, 3cm x 13cm and ink the edges.
Mat onto a white 13.5cm square blank with the cream panel at the top and the pale aqua panel below.
Round the corners of the blank.
Stick the mittens onto chocolate brown card and trim, then fix a tree to each. 
Attach a short length of green twine between the two, securing on the reverse. 
Adhere to the cream panel with foam pads.
Add the sentiment with brown lettering to the pale aqua panel and a gem to the top of each tree.

There you have it! A cosy card that makes you feel all warm and fuzzy inside :o)

I'll share with you the other card in this set at a later date. That one features a steaming cup of cocoa - yum!

You still have a week or so to grab this fantastic mag. As usual it's packed with gorgeous makes, great ideas, hints, tips and more; or you could pop on over to the Crafts Beautiful website, where you will find lots more projects and ideas. There are also lots of free patterns, papers and templates to download, you'll be spoilt for choice.

I'm going to sign off for now, I have to get on with some illustrations for a future issue of the magazine. Enjoy the rest of your day and thanks for calling in. xx

post signature

Friday, 6 September 2013

Chickens and a Happy Christmas!

Good afternoon peepsicles!
Wow! Friday again...
I haven't mentioned my 'girls' for a while. They have settled in really well and are growing really fast into beautiful chickens. Their wattles and combs are also growing, which means it won't be too long before they start laying.
They have each developed their own lovely and amusing personalities and I love them equally. Here is a few snapshots of my 'brood'.

Bren

Babs

Dolly

Hattie

Babs and Bren look a little scruffy around the head at the moment, they are just about to start their 'moult'. I think Hattie will be next.
They follow me round constantly, chatting, clucking and purring away. They all feed from my hand and Bren and Hattie will jump up on the garden chair and sit with me. They are fascinated with the colours of my painted toe nails and will have a peck at each one. It doesn't hurt though :o)
Right! Onto the card stuff. I have another quick, simple Christmas card to show you today. So, without further ado...


What you need...

Patterned paper: Kris Kringle 6" x 6" paper pad - S.E.I
Stamps: Joyful Greetings - Paper Smooches
Ink pad: Rich Cocoa - Memento
Ribbon: red
Gems: red
Adhesives

What you do...

Cut a piece of stocking and present paper at an angle and adhere to the bottom of a 13cm x 15cm top fold blank.

Stamp the sentiment to the left of the card, just above the paper edge. Wrap ribbon around the bottom and tie in a bow at the right. Finish with a few gems.

There you have it! I think this card would also look good with kraft card and a paper to compliment. I will have to have another play!

Okay. So I'm going to sign off for now. On with more commissions and over the weekend I'm going to make a batch of green tomato chutney. The greenhouse is full of the little blighters that refuse to turn red....grrr!

Thanks for calling in, see you soon xxx


post signature

Tuesday, 3 September 2013

Greetings of the Season!

Merry Christmas all!
Only joking...I would like to show you another Christmas card I whipped up.
I still have loads of lovely papers from previous years. Paper collections this last couple of years seem to have had toned down hues, don't get me wrong, I love all colours, but I do like bright and cheerful.
I used papers from the Echo Park 'Everybody Loves Christmas' collection, but you can use favourite papers from your stash.


What you need...

Patterned papers: Everybody Loves Christmas Collection Kit Collection - Echo Park
Stamps: Joyful Greetings - Paper Smooches
Die: Washer Border Decorative Strip (657826) - Sizzix
Ink pad: Tuxedo Black - Memento
Baker's twine: red
Glitter dots
Adhesives

What you do...

Cover the top two thirds of an A6 top fold blank with the 'Snowman' paper. Die cut a length of Washer Border in the reverse of the 'Snowman' paper and adhere underneath. Tie baker's twine around the join with the bow to the left.

Stamp the sentiment onto white card and trim into a banner. Mount onto a piece of the 'Wrapping Paper' and attach to the right of the blank, over the twine. Finish with a few glitter dots.

There we have it...a simple yet quick card. You could run off a batch of these in no time, the hardest part will be choosing the papers!

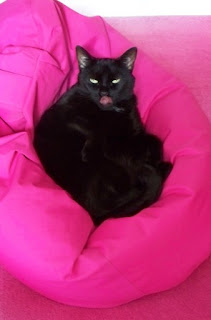
As I started to write this post, I could hear a crunching noise. It was Bazoo taking position on the bean bag under the desk behind me. It's such hard work for the poor love to chase those things that only cats can see in their mind, sleep and supervise me all day. Here is a quick piccy I took of the hard worker.


Sometimes she creeps into my craft room and just sits silently. After a while I can 'feel' the eyes burning into me. No doubt checking up on my progress. Cats!

Well, thank you all for dropping by and I will be back soon with another make. Toodle-pip! xxx
post signature


Thursday, 4 April 2013

Caught A Bug?

Hey folks!

How are you all doing? Brrrr, it's freezing here today, and it's windy - not good :o(

I was looking through the RetroSketches site last night and I came across this layout - #53


I knew exactly what stamp set and colours would look good with this, so here is what I came up with...


What you need...

Stamps: Healthy Vibes - Paper Smooches
Card stock: white, plum
Ink: Tuxedo Black - Memento
Promarkers: Ice Grey 1, Lime Green, Plum, Sunflower
Washi tape: plum, lime spotty, yellow line/dots
Punch: corner rounder
Buttons: plum, lime, yellow
Baker's twine: plum, lime, yellow
Adhesives

What you do...

Create a 13cm x 15cm white top fold blank and round the lower right corner. Attach three pieces of washi tape in varying lengths towards the left side of the blank, cut a notch from the bottom end of each.

Stamp the bugs and sentiment onto white card and colour in. Trim and mount onto plum card. Attach to the blank with foam tape. Tie three buttons with corresponding coloured baker's twine and fix to to the top of each strip of washi tape.

As you have probably noticed, I'm into the washi tape thing at the moment. I have had some for quite a while, but never really got round to experimenting with it. It's so cool. There's tons of stuff you can do with it and there is so much choice in colours and patterns.

I just love the colour combo of this card, it's so bright, fresh and zingy. At this time of year when there are a few 'bugs' going round, this card is quick and simple to make and will surely put a smile on the face of the most grotty feeling peep.

Well that's me for another session. Thanks for calling by, until next time....
  
post signature