Showing posts with label Jillibean soup. Show all posts

Tuesday, 20 May 2014

Monster Birthday (created with Cricut Explore)

Good afternoon peepsicles!

Simon and I spent a lovely weekend in the garden building chicken defences as the girls were taking over the patio (fingers crossed they haven't found a way round them yet). Simon is convinced that they are plotting to kill him, he says you can see it in their eyes. and that they are just like the raptors in Jurassic Park.

Today I thought I would spend a little time with the Cricut Explore as we have a family birthday coming up. I decided to do young Thomas a monster card. 

Here is a piccy of the creature feature...


What you need...

Die-cutting machine: Cricut Explore
Images: Bump in the Night - Fang #M440C6, Mr Baggs #M3DD63, Mr Marty #M3FA48; Doodlecharms - Star #M2FF07
Lettering: Cuttin' Up Font #S30
Vinyl: Black - Cricut
Card stock: brown, lime, orange, turquoise, white
Papers: 'Pinch of Hair' Monster Stew Collection 12x12  - Jillibean Soup
Card blank: white A6 top fold
Adhesives

What you do...

Die cut the three monsters in coloured card and assemble. Cut the stars and wording in black vinyl. 

Cut out one of the large journal spots from the 'Pinch of Hair' paper and mat to the left of the blank.


Fix the wording to the top of the journal spot, arrange and adhere the monsters at the lower right corner. Stick the stars above the monsters but below the wording.

Ta da! Simple!

I'm so in love with using vinyl on cards at the moment. It's so easy to work with and it cuts so cleanly and makes sticking letters to a card much easier than getting messy with glue pens. 

The monster images are so cute and I can't believe the precision of this machine. I'm keen to upload my own designs and see how they come out. I'll keep you posted on that one.

One of the brilliant things about the Explore is that you don't have to spend a lot of money on a cartridge if you only want a couple of the images. You can now purchase them individually and they start from only £0.79! Another good thing is that you can play with images, manipulate and re-size them before you buy. If you are happy with the image then you will be asked to purchase it before cutting - brill or what?

If you already have the Cricut Mini, any cartridges you purchased and have stored in your Cricut Craft Room will automatically be transferred to your Design Space.

Well that me for the time being. Don't forget you still have a couple of weeks to get those creations uploaded in the Cosmic Colours Challenge. You can enter as many times as you wish and you could win some lovely crafting goodies!

Thanks for dropping by xxx

post signature

Friday, 1 June 2012

Roses, a Monster and Herb!

Hello Chums!

I know, I know, two posts in one week! Wow, I must be on a roll. This one's a whopper too, with two cards and loads of piccies - whay!

Straight down to it then, the first card is a birthday card for a very dear and close friend, June. I designed this with her in mind, and I'm sure she will like it.


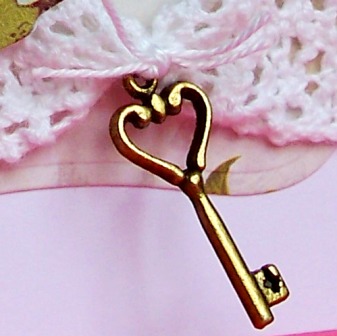
I made the three roses using the English Rose dies by Marianne Design Creatables, the roses and all the other paper elements were made using the Madeline 6x6 pad by Prima. The top note label behind the roses was cut using a die from the Spellbinders Nestabilities Labels One set. A length of cotton crochet lace, a pearl gem, a rub-on sentiment and an antique key were used to finish the card. Here are some close ups (getting all arty now with the 'ol photography).


I scrunched up the paper after die cutting the roses, then after rolling up, I bent the petals to give them a more aged, shabby chic look.


The butterflies were cut out of a butterfly design paper, I then layered them up, bending the wings slightly and finished with a pearl gem


I saw a pack of these darling antique keys by Creative Expressions and HAD to have.


Right, on to the next card, which is a stark contrast to the one above. This is for a young male relative (though it could work for the bigger boys). I thought all boys love monsters and instead of doing the usual trains, cars etc .....  a monster it will be!


The papers and journaling sprouts are from the Jillibean Soup Monster Stew collection and the sentiment is from the Hero Arts Monster Fun stamp set. After stamping the sentiment onto white card, I punched it out using a circle punch and mounted it onto one of the journaling sprouts, I then arranged it with a couple of more sprouts and attached to the front of a square black card blank. I hand cut some stars and an arrow, mounted them onto black card and then fixed them to the card, finally finishing with some purple twine wrapped and knotted on the left side.


Here are some more close ups....


On the inside, I created a simple sentiment, using die cut scallop circles (to mirror the monster sprout on the front) a rub-on and a scattering of hand cut stars. Ta da!!


Now then, you're probably wondering who Herb is. Well this is where we get silly. I was up at the local farm shop last week and I was picking some tomatoes and I came across this one......


.....well, I had to get it didn't I? So then, I put some googly eyes on it (I need to get out more methinks).


Looks good, but I don't know, not sure about the toupee and the eyes seem a bit wide, so I removed the toupee and turned him over, repositioned the 'ol eyes.....


.....that's better. He looks like a Herb, so that's what I've called him. I think he's really cute. Though he's still sat in our fridge, going a bit mushy now :( Oh well, he had a happy, if short life........................might be still edible. I'll put him in a ham sarnie for Simon tomorrow, bwa ha ha hah!

Enough silliness for today, I'm off now for a well deserved coffee, and a chocolate digestive mmmmm. Have a great weekend, will post back soon. Colette xx