Showing posts with label Prima. Show all posts

Thursday, 24 January 2013

Beautiful

Howdy chums!
Hope you are all well and happy :)
I'm on a roll mojo wise at the moment. Ideas keep popping in my head left, right and centre. So, here is another one of those 'ideas' (which came from the left, I think).


What you need...

Dies: Flower Layers #9 - Sizzix; Grunge Flower #1- PaperArtsy
Patterned paper: Soho Garden 6x6 Paper Pad - American Crafts
Stickers: Doodle Deux Typeset Tiny Alphabet - Prima
Adhesive tape: Washi aqua, lime - MT
Card stock: aqua, lime
Buttons: pink
Baker's twine: pink
Punch: corner rounder

What you do...

Create a top fold A6 blank and round off the lower right corner. Apply a length of aqua and lime Washi tape from the top left of the card, cut a notch in the ends.

Die cut one large, one small and two medium flowers in brown floral paper, then die cut one medium and two small flowers in aqua card. Use the leaf from the Grunge Flower set and cut two in lime card. Scrunch all the pieces up and then layer.

Attach the flowers and leaves to the card over the top of the Washi tape. Tie baker's twine through three buttons and stick to the centre of each flower. Apply a word sticker over the bottom of the Washi tape, just above the notches.

There you have it! I'm pleased with the way this card turned out. I did initially have it the other way round - a side fold landscape, but I like the way the Washi tape looked coming from the top, rather than the side. The photo turned out really well too. I didn't have to do much tweaking. Overall I'm a happy bunny - woo hoo!

Well thanks for stopping by today. I'm going to make a nice hot cup of tea. Until next time. xxx

Monday, 19 November 2012

Blue Bird of Happiness

Evenin' friends!
Hope you all had a lovely weekend. Not sure where mine went to really...
It is my friend Stephen's birthday on Friday. He has a brilliant sense of humour and I know he will smile when he sees this card I've created, the look on the bird's face just says it all. The stamp set is another one from the excellent Art Impressions Zoo Crew Collection.
So here it is....


Ingredients...

Stamps: Buzzard Set (4194) - Art Impressions
Paper: Doodle Deux 6"x6" Paper Stack - Prima
Ink: Onyx Black - Versafine
Cardstock: black, white
Embossing powder: Detail Clear - Stampendous
Promarkers
Button: black
Ribbon: black

Method...

Stamp and emboss the bird and sentiment, trim and mat onto black card. Colour in the bird. Cut strips of patterned paper and adhere (at angles) onto a top fold A6 blank. Attach the bird to the top right corner and the sentiment at the bottom left, lining up each with the card edge.

Wrap ribbon around the card between the image and sentiment, thread through a black button and secure on the left, trim the ends. There you have it!

This card is so funny. It lends itself very well to a male card, though I can think of a few ladies who would like it. I also tried to pick papers that complimented the colour of the bird, without taking over. This collection from Prima was just perfect.

I'm signing off for now, thanks for calling and I'll post again soon with another Christmas card. Happy evening all! xx


Tuesday, 16 October 2012

Joy & Peace

Aft'noon chums!
It's a very blustery day here in Norfolk. The leaves are trying to hold on tight, but I think the wind is winning!
I have another Christmas card for you today.
Here it is....


What I used.....

North Country 6x6 paper stack - Prima
Framelits Circle Dies - Sizzix
Sentiment rub-on & snowflake - K & Company
White sparkly ribbon
Pale blue button

Die cut two large, different sized circles in co-ordinating papers, layer them at the bottom left corner of a white blank, just so they overlap the sides, and trim. Mount a snowflake embellishment in the centre. Fold a length of ribbon and notch the ends, stitch a button near the fold and attach to the top of the circles. Finish with a sentiment in the top right corner.

I intended to just have the circles on the blank. After I had stuck them down, they reminded me of a bauble. I have this really pretty ribbon, that is sparkly, but not overpowering. So I used that and a button as the bauble 'hanger'.

I think it's a fresh and simple card. The North Country pad has some beautiful papers in it, but I can't wait to make more of the same layout in different colour schemes.

Off now to make a coffee, then I think I'll rustle up another card or two (before I have to tackle to biggest pile of ironing I have ever dared to clap my eyes on). Groan.

Thanks for calling. xx

Friday, 1 June 2012

Roses, a Monster and Herb!

Hello Chums!

I know, I know, two posts in one week! Wow, I must be on a roll. This one's a whopper too, with two cards and loads of piccies - whay!

Straight down to it then, the first card is a birthday card for a very dear and close friend, June. I designed this with her in mind, and I'm sure she will like it.


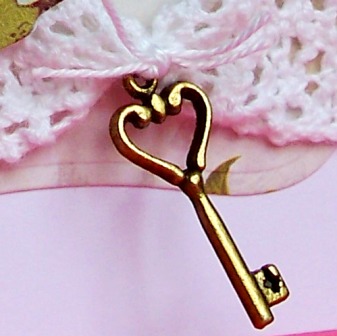
I made the three roses using the English Rose dies by Marianne Design Creatables, the roses and all the other paper elements were made using the Madeline 6x6 pad by Prima. The top note label behind the roses was cut using a die from the Spellbinders Nestabilities Labels One set. A length of cotton crochet lace, a pearl gem, a rub-on sentiment and an antique key were used to finish the card. Here are some close ups (getting all arty now with the 'ol photography).


I scrunched up the paper after die cutting the roses, then after rolling up, I bent the petals to give them a more aged, shabby chic look.


The butterflies were cut out of a butterfly design paper, I then layered them up, bending the wings slightly and finished with a pearl gem


I saw a pack of these darling antique keys by Creative Expressions and HAD to have.


Right, on to the next card, which is a stark contrast to the one above. This is for a young male relative (though it could work for the bigger boys). I thought all boys love monsters and instead of doing the usual trains, cars etc .....  a monster it will be!


The papers and journaling sprouts are from the Jillibean Soup Monster Stew collection and the sentiment is from the Hero Arts Monster Fun stamp set. After stamping the sentiment onto white card, I punched it out using a circle punch and mounted it onto one of the journaling sprouts, I then arranged it with a couple of more sprouts and attached to the front of a square black card blank. I hand cut some stars and an arrow, mounted them onto black card and then fixed them to the card, finally finishing with some purple twine wrapped and knotted on the left side.


Here are some more close ups....


On the inside, I created a simple sentiment, using die cut scallop circles (to mirror the monster sprout on the front) a rub-on and a scattering of hand cut stars. Ta da!!


Now then, you're probably wondering who Herb is. Well this is where we get silly. I was up at the local farm shop last week and I was picking some tomatoes and I came across this one......


.....well, I had to get it didn't I? So then, I put some googly eyes on it (I need to get out more methinks).


Looks good, but I don't know, not sure about the toupee and the eyes seem a bit wide, so I removed the toupee and turned him over, repositioned the 'ol eyes.....


.....that's better. He looks like a Herb, so that's what I've called him. I think he's really cute. Though he's still sat in our fridge, going a bit mushy now :( Oh well, he had a happy, if short life........................might be still edible. I'll put him in a ham sarnie for Simon tomorrow, bwa ha ha hah!

Enough silliness for today, I'm off now for a well deserved coffee, and a chocolate digestive mmmmm. Have a great weekend, will post back soon. Colette xx


Friday, 18 May 2012

A twit and a thank you!!

What'cha Peeps!

I haven't posted for a couple or weeks, been so busy! Just finished another commission for Crafts Beautiful. Just the destructions to compile, then I can print them out and send it all off, hope they like!!!

Managed to get the plants done in the greenhouse last week and some of the pots done around the garden, herbs and stuff. I've also planted a few fuchsias, I love fuchsias, they are so pretty and uncomplicated. There are quite a few hardy bushes in pots that have survived the winter and are now coming back, though I did get some more the other week the replace the non-hardy varieties.

The fern is doing well too, it's still uncurling its fronds. I've never seen a fern as big as this one. When we first moved in, it was November, Simon took one look at it and said 'That's dead'. Shocked, I told him it was a fern, it wasn't dead, it will come back in the spring, they're not cheap to buy and not to touch it if he values his dangly bits. Needless to say he doesn't really do much gardening apart from mowing the lawn and any construction jobs that need doing, I don't think I could trust him to look after the plants - gulp!

You're probably wondering about the title of this post, well, it was my brother-in-law's birthday this week and I did him a card with an owl on the front. It does say 'twoo' inside though, he is not a twit by any means:) Here is a pic....


...and the inside.


Out of all the stamps I have, I couldn't find the right one. I wanted an owl with that 'Why are you bothering me?' expression they have (some might call it grumpy). So I drew my own!  The paper is from the 'Social Club' 6x6 pad by Cosmo Cricket. It's full of lovely manly colours and prints, very retro. I coloured in the owl with Promarkers, matching the colours to the paper. The branch and leaves are cut out from a piece of white card, then mounted over the patterned paper. A few leaves were cut by hand and added to give a bit more dimension. I stamped the 'twit' sentiment on to a piece of white card, wrapped garden twine around it and secured with a couple of staples. The card was finished with the 'twoo' sentiment inside and a 'Happy Birthday' rub-on from Kaisercraft.


My friend Caroline sent me a lovely card and gift voucher for my birthday, so I decided to send her a little 'thank you' card.


The papers and stamps are Doodle Deux by Prima, just a simple card with stamped elements, papers and buttons placed randomly, finished with a  'thank you' rub-on in the top left corner. I just love this collection, especially the little birdie stamp. It was so hard to choose which paper to put on the card.

Off now, going to make a coffee, then back to the typing of the ol' destructions. Have a lovely weekend and thanks for visiting!!


Friday, 21 October 2011

Almost finished!

Hi all! After reading Suzannes post on ugly cards, I've picked one of mine. I had to choose the tall pale blue card. Bleughhh! What the hell was I thinking. I know I hadn't been doing my blog for very long, but why chose this monstrosity for the whole world to see? The card is awful and the photography isn't any better.
Thankfully I think I've come on with the ol' photo side of things now. The worst thing is, I sent it to my sister for her birthday - sorry Yvonne. No offence. I've never been happy with it on my blog, but I'm going to leave it there as a reminder of how not to make a card :o)
Have a good laugh, I did - with a bit of cringing too.
Colette xx
Hello again.

I can't believe it's nearly a week since my Mum went home. We had a lovely time and such a good laugh (we have the same mad sense of humour) and I'm missing her terribly.

I'm almost finished my latest project for Crafts Beautiful. Can't say any more, you'll have to wait to see it in the magazine. For more crafting ideas visit Crafts Beautiful.

It's been a challenge. Why is it you have an idea in your head, and despite all the beautiful papers etc. you have, you never seem to have the one that is just right. So, then you have to have a re-think, so annoying.

In between the magazine projects, I've got Christmas cards, general friends and family Birthday cards, plus a Halloween project for my nephews and niece, Thomas, William and Emily. I'll take a piccy of it when it's finished and post it on here.

Talking of piccies, here are few more of my recent creations. Hope you like.


Take a pale blue tall card blank, round the top right hand corner. Stamp some swirls in brown ink and a sentiment on the lower left hand side. Die cut two flowers, layer up and attach a button and fix to the card over the swirls, add a few pearls to finish. I used the Prima 'Madeline' papers for the flowers.


Trim 3cm from the edge of a black 15cm square card blank. With the fold at the top, cover 3/4 of the top right hand side with patterned paper and the bottom edge with a co-ordinating paper. Tie a ribbon around the join. Stamp and heat emboss a cat, shade in with Promarkers and attach to the card above the knot. Finish with 'purrr-fect' using rub-on alphabet letters and a few hot fix crystals. The cat is from the 'Pampered Pets' stamp collection by docrafts and the papers are from the Anna Griffin 'Fifi & Fido' collection and are just too scrummy for words.

Well, I'm off to make a coffee and crack on with my commission. Have a lovely weekend, until next time. Ta ta.