Showing posts with label Spellbinders. Show all posts

Sunday, 16 February 2014

Batty In Love

Hello chums!
Well, what a difference from yesterday. We have blue skies and no wind! Yippee! It's quite mild as well. Even the chickens are sunbathing this morning.
Hopefully this clement weather will last long enough to dry out the garden a bit. I can't moan really, when all those poor people down in the South East have had their homes ruined by floods. What's a soggy, boggy lawn compared to that?
As promised in my post yesterday, I have another quirky 'love' card to share with you. Again, this is part of the set I did for the February 2013 issue of Crafts Beautiful. I think this would be good for an engagement or anniversary card.
Here goes...


What you need...

Stamps: Falling For You - Paper Smooches
Dies: Labels Eight - Spellbinders
Card: white, purple, lime, aqua
Ink pad: Onyx Black - Versafine
Embossing powder: Detail Clear - Stampendous
Promarkers
Punch: corner rounder
Ribbon: purple
Button: aqua
Twine: white
Glitter dots
Adhesives

What you do...

Stamp, emboss and colour in the bat, two plain hearts, a plaid heart and the sentiment. Cut out the bat with a label die, mount it onto a larger lime then a large aqua label. Trim a small section from the top and attach to a top fold A6 blank.

Cut out the hearts and sentiment and mount onto purple card and adhere to the blank. Round off the two bottom corners of the blank, wrap and tie ribbon around the top of the card. Finish with a button tied with twine and a few glitter dots.

There we have it, another bright quirky card. I just love the colour combination of this set. They are some of my fave colours and I tend to use them quite a lot. Bright and cheerful is the way to go. Don't be afraid of using bright, clashing colours together; they look great against a white background.

That's me for the nonce. I'll be back soon to show you a sneaky peek of my makes in the current issues of Crafts Beautiful and Papercrafter.

Take care. xxx

post signature

Thursday, 8 August 2013

Martha Rose

Mewnin' chums!
Hope you are fit and well. Today I would like to show you a card that some friends commissioned me to make to give to their daughter Martha Rose for her Christening.


What you need...

Dies: Labels Eight - Spellbinders; Chinese Roses, English Roses - Marianne Design Creatables
Punches: Pointed Butterflies 3/8", 5/8", 1" - X-Cut
Card stock: white, lime, pink (pale/mid/dark)
Ink pad: Orchid - Versacolor
Seam binding: white
Decorative pin: white
Crystal: clear
Adhesives
Computer & printer
Font: Italiano

What you do...

Print the sentiment onto white card. Die cut a large label in pale pink and the sentiment with a smaller label. Mount onto the lower left of an A5 landscape blank.

Die cut three leaves from the English Roses set in lime card, a large Chinese rose in dark pink and one in mid pink and a small rose in white. Ink the edges of the small rose with Orchid ink. Scrunch up the leaves and roses and assemble. Arrange and stick to the lower left of the sentiment panel.

Make a bow using two lengths of seam binding, push a pin through the knot and glue to the top of the roses.

Punch two large, one medium and two small butterflies in white card, repeat with shades of pink. Fold back the wings of the pink butterflies and attach to the white ones so the wings stand up. Adhere to the blank. Embellish with a few crystals to finish.

I wanted to keep the card simple, clean and elegant, using only a few colours. I think it looks really fresh and pretty. Martha's parents love it (phew).

I'm in the process of making our card to give to Martha, so I'll be back later to show you.
Thanks for popping by xxx

post signature

Friday, 1 June 2012

Roses, a Monster and Herb!

Hello Chums!

I know, I know, two posts in one week! Wow, I must be on a roll. This one's a whopper too, with two cards and loads of piccies - whay!

Straight down to it then, the first card is a birthday card for a very dear and close friend, June. I designed this with her in mind, and I'm sure she will like it.


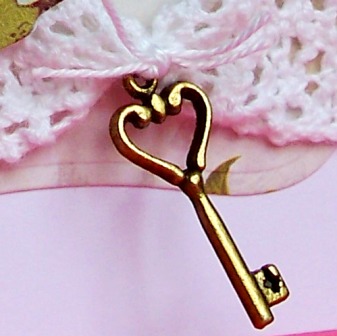
I made the three roses using the English Rose dies by Marianne Design Creatables, the roses and all the other paper elements were made using the Madeline 6x6 pad by Prima. The top note label behind the roses was cut using a die from the Spellbinders Nestabilities Labels One set. A length of cotton crochet lace, a pearl gem, a rub-on sentiment and an antique key were used to finish the card. Here are some close ups (getting all arty now with the 'ol photography).


I scrunched up the paper after die cutting the roses, then after rolling up, I bent the petals to give them a more aged, shabby chic look.


The butterflies were cut out of a butterfly design paper, I then layered them up, bending the wings slightly and finished with a pearl gem


I saw a pack of these darling antique keys by Creative Expressions and HAD to have.


Right, on to the next card, which is a stark contrast to the one above. This is for a young male relative (though it could work for the bigger boys). I thought all boys love monsters and instead of doing the usual trains, cars etc .....  a monster it will be!


The papers and journaling sprouts are from the Jillibean Soup Monster Stew collection and the sentiment is from the Hero Arts Monster Fun stamp set. After stamping the sentiment onto white card, I punched it out using a circle punch and mounted it onto one of the journaling sprouts, I then arranged it with a couple of more sprouts and attached to the front of a square black card blank. I hand cut some stars and an arrow, mounted them onto black card and then fixed them to the card, finally finishing with some purple twine wrapped and knotted on the left side.


Here are some more close ups....


On the inside, I created a simple sentiment, using die cut scallop circles (to mirror the monster sprout on the front) a rub-on and a scattering of hand cut stars. Ta da!!


Now then, you're probably wondering who Herb is. Well this is where we get silly. I was up at the local farm shop last week and I was picking some tomatoes and I came across this one......


.....well, I had to get it didn't I? So then, I put some googly eyes on it (I need to get out more methinks).


Looks good, but I don't know, not sure about the toupee and the eyes seem a bit wide, so I removed the toupee and turned him over, repositioned the 'ol eyes.....


.....that's better. He looks like a Herb, so that's what I've called him. I think he's really cute. Though he's still sat in our fridge, going a bit mushy now :( Oh well, he had a happy, if short life........................might be still edible. I'll put him in a ham sarnie for Simon tomorrow, bwa ha ha hah!

Enough silliness for today, I'm off now for a well deserved coffee, and a chocolate digestive mmmmm. Have a great weekend, will post back soon. Colette xx