Showing posts with label Little Things From Lucy's Cards. Show all posts

Tuesday, 3 August 2021

Celebration Cake

Hello there!

I'm back with another card to share with you. This one is a fun cake card done in lovely summer sorbet shades.

I found that I didn't have any colours of card stock in the shades I had in mind. I solved this by creating my own with Promarkers. I haven't used my Promarkers for a while, so I thought I would dust them off and get them used.

Even though I have the full range of Copic markers, I find that sometimes they don't have the exact colour I'm looking for. This is where Promarkers come in, they have some beautiful colours, especially the pastel and sorbet shades. So why not mix the two brands?

This is a simple stamped image on a large white banner. I made the coloured background by die cutting strips of white card, shading them in and then arranging them onto some copy paper and sticking down. This was then cut in a panel.


What you need...

Stamps:
Birthday Bash - Paper Smooches

Dies:
Horizontal Stripes - Waffle Flower
A2 Layers
Scalloped Banner Set - Avery Elle

Ink pads:
Tuxedo Black - Memento

Alcohol markers:
Pink Carnation - Promarkers
Peach
Lime Green
Pastel Green

Embellishments:
Crystal Collection-Glass - Little Thing's from Lucy's Cards

Card stock:
White

Extras:
Adhesives
Crystal Clear Shimmer Pen

Tools:
Big Shot - Sizzix

What you do...

1 Die cut the horizontal stripes in white card. Use Promarkers to colour the stripes in the four colours that you want to arrange them.

2 Add double sided adhesive to a piece of white copy/scrap paper and stick down the stripes. Die cut into a panel using the 3¾" x 5" die from the A2 Layers set. 

3 Stamp the cake onto white card with the sentiment lined up underneath. Colour in using Promarkers.

4 Use the pinpoint border banner to cut out the cake image. 

5 Create a 4¼" x 5½" white blank. Mat the striped panel onto it. Add the banner with foam tape. Embellish with some of the Glass gems and highlight the icing on the cake with shimmer pen.

I used one of my old Paper Smooches stamp sets here, but there are so many cute cake stamps on the market along with some adorable sentiments. Use what ever you have in your stash.

This card layout would look good for a lot of occasions. Done in masculine colours with a male oriented image/motif/sentiment would be great. I think I might do a Christmas version.

Sadly I didn't get round to starting my Christmas cards in July. Magazine work always gets hectic at this time of year as deadlines are tighter to get in the extra issue. Hopefully I should be able to get going with the Christmas cards soon. Watch this space as they say.

Just before I go, I just want to mention that as Feedburner no longer supports email subscriptions, I have changed over to follow.it. This means your notification email will look slightly different, but it still does the same job of notifying you when I upload a new post.

If you have a blog that used Feedburner and haven't changed over to a new email subscription service I can highly recommend follow.it. They had reached out to me, but I had already considered using them anyway. It was so easy to set up and the support is great. Click here to find out more.

Thank you for stopping by, I do appreciate it. See you soon!


Wednesday, 2 June 2021

Celebrate!

Hello again!

I'm back with another colourful card. This one features candles....and lots of them! I came across a gorgeous die by Sizzix and well, I had to have it. 

The die set is so versatile and there are a few ways that you can use it. I made two cards using two very different techniques, I will share the other card with you in my next post.


What you need...

Stamps:
Sentiment Sampler - Paper Smooches

Dies:
Birthday Candles (665071) by Kath Breen - Sizzix

Ink pads:
Dried Marigold Distress Oxide - Tim Holtz
Kitsch Flamingo
Squeezed Lemonade
Twisted Citron
Onyx Black - Versafine

Embellishments:
Over the Rainbow Crystal Collection - Little Things from Lucy's Cards

Card stock:
White

Extras:
Adhesives

Tools:
Big Shot - Sizzix
Blending tools

What you do...

1 Cut a panel of white card to 2⅞" x 6" (7.5cm x 15.5cm). Die cut the candles centrally within the panel.

2 On a slightly smaller piece of white card, blend the inks starting with Kitsch Flamingo followed by Dried Marigold, Squeezed Lemonade and Twisted Citron.

3 Mat the die cut panel onto the inked panel. 

4 Stamp the sentiment onto white card with the Onyx Black, trim and adhere to the centre of the candle panel.

5 Create a white blank 3⅛" x 6¼"  (8cm x 16cm). Add the candle panel with foam tape.

6 Add some gems to some of the candles, matching with the colour of each candle.

I kept all the cut pieces of the candles, these could be inked for a future card. I think this is such a fun card and would be ideal for any recipient, young or old.

As I mentioned before, I made another card with this die and I will be back soon to share it with you. Until then, please take care and happy crafting!


Thursday, 20 May 2021

Balloon Celebration

Good afternoon!
I hope you are all well. Sorry I haven't posted sooner, but I have quite a few magazine projects to get in before the deadlines. Can you believe I am designing for Halloween and Christmas? Yipes!

Moving away from halloween and Christmas, I have a lovely, bright card to share with you today perfect for a celebration or birthday and it features balloons!

I've used a lovely rainbow palette and the techniques used are ink blending, stamping, die cutting and layering.

Here it is...


What you need...

Stamps:
Birthday Bash - Paper Smooches
You Said It - Doodlebug Designs

Dies:
A2 Layers - Waffle Flower
Say Cheese, Again - Lawn Fawn

Ink pads:
It's a Girl - Catherine Pooler
Garden Party
Pixie Dust
Cantaloupe - Memento
Buttercup Make Art - Wendy Vecchi
Garden Patina
Onyx Black - Versafine

Embellishments:
Pearls Glossy Porcelain Mix - Little Things from Lucy's Cards

Card stock:
White

Extras:
Sparkle Crystal Clear Shimmer Pen
Adhesives

Tools:
Big Shot - Sizzix
Blending tools

What you do...

1 Die cut the large photo frame from white card. Cut a panel of white card slightly smaller than the frame.

2 Blend Garden Patina ink at the bottom of the card panel fading to white.

3 Use the aperture of the frame as a guide and stamp the trio of  balloons twice. Use the solid balloon stamp to fill in the colours. Stamp dots above each balloon in the same colours.

4 Die cut the 3¾" x 5" layer in white card and blend the six colours in rainbow order.

5 Mat the rainbow panel onto a card blank 4¼" x 5½". Attach the balloon panel centrally at the top.

6 Stamp the 'Celebration' in black ink across the base of the photo frame and attach to the blank with foam tape, making sure it lines up over the balloon panel. 

7 Add some shimmer to each of the balloons and add some pearls to the blank.

Even though I do use some new products, I am trying to use some of my older stash too, hence the Paper Smooches and Doodlebug stamp sets. Of course you can use any balloon themed stamps in your stash to re-create this card. 

Top tip: If you don't have any balloon stamps, but you have solid balloon dies, cut balloons from foam sheets. Attach to an acrylic block/stamp platform with glue stick or double sided tape, apply ink and stamp!

I have used the A2 Layers die set which is measured in inches. The metric equivalent of the rainbow panel is approximately 9.5cm x 12.5cm and the blank is 11cm x 14cm.

I hope you like this pretty, cheerful card. You can of course change the colours for a card suited to a male recipient.

Thank you for popping by and I'll be back soon.


Tuesday, 11 May 2021

Cactus Trio

Hello there, me again!

I'm back with another cactus card. This one is the last of three that I created with the Silhouette Cameo. It is an unusual card in that it has a top and bottom flap that opens rather than the standard side or top fold card. I chose bright colours and added a touch of sparkle to the flower and added a few gems.


What you need...

Digital image: 
Cactus Card by Daniela Moscone (#197812) - Silhouette

Card stock:
Pool
Dark Pool
Mid Green
Dark Green
Pink
White

Vinyl:
Midnight - Cricut

Embellishments:
Dewdrops - Little Things from Lucy's Cards

Extras:
Adhesives
Sparkle Crystal Clear Shimmer Pen

Tools:
Silhouette Cameo

What you do...

1 Load the image onto the Design Studio and re-size so the width of the main card is 14.5cm wide. Lock the aspect ratio so that everything keeps in proportion.

2 Type out the wording, change to your desired font. Re-size so it fits across the top section of the card.

3 Send the images to the Cameo, adjust the blade if necessary and cut out in the relevant colours.

Cut the font in Midnight vinyl.

Assemble the card using the image photo as a guide. Add the wording to the top section. Use the shimmer pen to add some shimmer to the flower. Finish with some Dewdrops to the left of the cactus pot.

I have a confession, I can't remember what font I used for the wording. I found the wording already cut out in my stash from some previous projects. I did go through all the fonts within the Silhouette. I think it was a font I used with my Cricut. The nearest font I could find is one called Paprika which is available through the Silhouette Design Store.

This is a lovely, bold and colourful card and I had fun assembling it. I might have to make it again in a different colour scheme. I think it's a good card to make if you are in a rush or want to make a batch as everything is already thought out for you.

Right then, that's me for now. Thank you as always for stopping by, take care and I'll be back soon.


Tuesday, 20 April 2021

Floral Heart

Good afternoon!

I hope you are enjoying the lovely spring weather. I popped out this morning to get my annual tomato plants ready to put in the greenhouse. I also picked up a sweet yellow pepper plant and a hot chilli pepper plant. 

I think everyone else had the same idea, as the garden centre was packed. The garden centre had a really good system in place and luckily everyone practiced social distancing and wore their masks. 

Talking of garden centres and plants, I have an adorable little card to share with you that has a floral theme. This is created by using a stunning stamp set by Concord & 9th. I did do a card back in October (click here to take you to the post) that used this stamp set, but I did it as a new home card and with a different colour scheme.

I do believe that this stamp set is still available at Seven Hills Crafts and Bumbleberry Papercrafts (click on the shop name to link you to the product).


What you need...

Stamps: 
Floral Print Silhouette Stamp Set - Concord & 9th

Dies: 
Halftone Hearts - Altenew
Additional Circles - Waffle Flower

Ink pads:
Onyx Black - Versafine
Grapefruit - Concord & 9th
Sprout

Embellishments:
Droplets Crystal Clear Hearts - Little Things from Lucy's Cards

Card stock: 
White

Tools:
Big Shot  - Sizzix
Stamping Platform - MISTI

Extras:
Foam sheets
Adhesives


What you do...

1 Use a stamp positioning tool to stamp the first layer of the floral image with black ink. Next, line up the flower section and stamp in Grapefruit. Line up the foliage layer and stamp in Sprout ink.

Die cut the stamped panel with a circle die (approx. 3⅜" or 8.5cm diameter). Die cut the fourth largest heart from the centre of the circle. 

3 Die cut the the fifth largest heart from within the larger heart.

4 From a piece of foam sheet, die cut a slightly smaller circle than the stamped section; then cut the larger heart from the centre of it, making sure it lines up. Glue the printed circle onto the foam.

5 Die cut the smaller heart from a foam sheet and glue the printed heart to it.

6 Create a 4¼" x 5½" (11cm x 14cm) white blank and adhere the stamped circle panel at the top. Add the smaller heart to the centre of the larger one.

7 Stamp the sentiment underneath and finish with some heart droplets.

I love this stamp set, I think it's so elegant. I think a colour scheme where the flowers are stamped in red with bright green foliage would make a wonderful and different Christmas card.

I have been having an obsession with making cacti themed cards lately, so I'm looking forward to sharing those with you soon.

Thank you for popping by, take care and keep safe!


Wednesday, 14 April 2021

Goth Rainbow

Hello there!

I am back with something a little bit different. You may or may not know that I am a heavily tattooed, pierced, always wears black Goth (I do not possess any coloured clothing, apart from one little dress that has skulls and roses on it) and I'm proud to be one.

Well, a lot of people who know me are always surprised that I do such bright and colourful cards. I do love colour, especially lime green and shades of aqua/teal - just not on me.

I am so loving all the rainbows and bright colour schemes that is around at the moment in the card making world and I truly hope that these will never go out of favour. However, I did wonder what a rainbow would look like if it was Goth.

To all those closet Goth rainbows out there, I have made a card just for you...


What you need...

Stamps:
Rainbow Wishes - Concord & 9th

Dies:
Clouds - Paper Smooches

Ink pad:
Obsidian Amalgam  - Gina K

Card stock:
Black
White

Embellishments:
Silver Mix Pearls - Little Things from Lucy's Cards

Extras:
Rub-on lettering
Adhesives

What you do...

1 Cut a piece of white card 6.5" x 4.5". Stamp the arches of the rainbow in black ink, alternating between solid and patterned arches.

2 Die cut two clouds and fix at the ends of the arches.

3 Stamps some raindrops in black ink under each cloud and a heart under the smallest arch.

4 Apply the lettering around the top left of the largest arch. Add some silver pearls to decorate.

5 Mat onto a black 5" x 7" blank.

I had to go large with this card to fit the rainbow in as this is quite a large stamp set. I love the fact that you can mix and match the arches.

I do have some smaller rainbow stamp sets, so I might have to make them Goth too.

This was just a bit of silly, but I hope I have done those Goth rainbows (and Goths) proud!

Thank you for popping by and I'll be back soon with another brightly coloured make.


Tuesday, 30 March 2021

If You Were Milk - Snarky Cat

Hello there!

I'm back with another card. This one is very quirky and snarky. I have used the oh so funny Snarky Cats by Tim Holtz. The cat I used in this one went perfectly with the sentiment, its face says it all.


What you need...

Stamps:
Tim Holtz Snarky Cats (CMS392) - Stampers Anonymous

Stencil:
Circle Extraordinaire (ST-122) - My Favorite Things

Ink pads:
Dried Marigold - Tim Holtz Distress
Squeezed Lemonade
Twisted Citron
Tuxedo Black - Memento

Embellishments:
Midnight Mix Sequins - Little Things from Lucy's Cards

Washi tape:
Black/white houndstooth - MT

Card stock:
white

Extras:
Adhesives
Masking paper - Inkadinkado

What you do...

1 Cut a piece of white card stock 4"x 5¼" (10.5cm x 13.5cm) and position the stencil so it sits central. Use the stencil to get an idea where you want the cat to go. 

2 Ink up the cat and stamp so it sits near the lower right corner. Stamp the cat again onto some masking paper and fussy cut out. Place over the original cat.

3 Replace the stencil and blend the inks, starting with Dried Marigold followed by Squeezed Lemonade and finishing with Twisted Citron. Remove the masking paper.

4 Add a strip of Washi tape across the bottom of the panel so it lies at an angle and immediately under the cat.

5 Stamp the sentiment at the top left of the circle.

6 Mat the panel onto a white 4¼"x 5½" (11cm x 14cm) top fold blank. Add some black sequins to decorate.

I always use a quick drying dye ink to stamp the image onto the card panel and masking paper otherwise it can smudge when you ink blend over it. If you have a stamping platform, keep the cat stamp on the platform and after removing the mask, stamp over the cat with a crisp, rich ink such as Onyx Black by Versafine. This will really make the original stamped image pop with the risk of smudging.

Sometimes if you don't use a quick drying dye ink on the original image, the masking paper can pick up some of the ink and transfer it onto your card panel if you have to reposition it. Not good.

I hope you like my snarky little card, I have the Christmas version too, so I'm looking forward to playing with that one.

As always, thank you for stopping by and take care. 

Wednesday, 17 March 2021

Spring Roses Mother's Day Card - Altenew & Concord & 9th

Hi blog friends!

My, it's been a while hasn't it? I hope you are all still keeping safe and well in this crazy world.

To be honest I haven't really been making cards for personal use, the craft magazines have been keeping me exceptionally busy and after finishing those projects, I just wasn't in the mood. 

Anyhoo, with Mother's day coming up, I knew I had to get creating. I am a big fan of Altenew and last year I purchased their beautiful die set called Spring Roses. 

This die set consists of three quite large clusters of roses. I knew that I wanted to make my Mum a card using these dies. I teamed them up with some bold lettering by Concord & 9th and some subtle stencilling.

What you need...

Dies: 
Spring Roses - Altenew
Double Cut Alphabet - Concord & 9th

Stencil:
Basic Spots - Clearly Besotted

Ink pad:
Sprout - Concord & 9th

Card stock:
Key Lime - Silhouette Self Adhesive
Leaf Green
Mint
Black
Solar White 110lb - Neenah Classic Crest

Embellishments:
Lucky Dip Night - Little Things from Lucy's Cards

Extras:
Adhesives

What you do...

1 Die cut the larger of the double cluster of roses once each in Black, Mint and Key Lime. Use a small piece of Leaf Green to cut the small cluster of spiky leaves.

2 Cut a 10.5cm x 13.5cm piece of the white card and with the Sprout ink, stencil an area of spots in the centre of the card, blending to a fade.

3 Attach the roses to the lower right corner. Then infill with the Leaf Green, Key Lime and Mint die cut pieces.

4 Die cut the 'MUM' from the Black card and adhere above the rose cluster and add some black gems.

5 Mat the panel onto an 11cm x 14cm top fold blank.

I was debating as to create the roses with pink card, but I'm glad I went with the Mint colour. My Mum loved it. Remember to keep all the extra die cuts to create another card. 

Before I started to infill the roses, I noticed it looked really good with just the outline of the flowers over the stencilled background, I will have to do that one in a future project.

I will sign off for now, I do have a 3D St. Patrick's Day card I did for some friends which was created using my Silhouette, so I'll be back soon with that one.

I am entering this make into the Crafty Creations Challenge #419 - Anything goes. Click here to take you to the challenge.

Thank you for stopping by and see you soon, keep safe!


Sunday, 13 December 2020

Winter Christmas Trees

Hello friends!

I'm back with another card to share with you, this one being Christmas. This is a card I did for my Mum and was inspired by one that Jennifer McGuire created. It is a trifold card where the sides open outwards and uses a beautiful die set by Hero Arts.


What you need...

Dies: 
Winter Pine Fancy Dies - Hero Arts

Stamps:
Silent Night - Concord & 9th

Ink pads:
Chipped Sapphire - Tim Holtz Distress Oxide
Blueprint Sketch
Salty Ocean
Onyx Black - Versafine

Embellishments:
Glass Crystal Collection - Little Things from Lucy's Cards

Extras:
Sparkle Sheer Shimmer Craft Spray - Imagine Crafts
Crystal Clear Sparkle - Spectrum Noir
Titanium White Acrylic Ink - Amsterdam
Adhesives

What you do...

1 To make the trifold section, click here to see the project by Jennifer along with the instructions and measurements - she can explain it better than I ever could!

2 Set the assembled trifold section aside. Cut a piece of card 4¼" x 5½" and blend the three blue inks over the surface. Spritz with the Sparkle spray and use a paintbrush to flick white ink over the surface. Allow to dry.

3 Fix the inked panel to the back of the trifold section. 

4 Add some Crystal sparkle around the edges of the trees and add plenty of the Glass crystals. Stamp the sentiment on the back panel between the trees.

I'm so sorry that the photo doesn't do the card justice, plus it was difficult to position due to the nature of the blank. The best thing is my Mum loved it.

Jennifer did her card with a pink/red/purple background which looked stunning, but I thought I would stick to the traditional blue night sky.

I hope you like my little make and thank you so much for popping by. I'll be back soon with another, until then take care and keep safe.


Tuesday, 8 December 2020

Leafy Heart

Good morning all!

Wow! It is a very, very cold and frosty day here in Norfolk. Yesterday afternoon I had taken a friend shopping and the temperature had dropped from around 6°C to 1°C in about 10 minutes. It went from being a bright blue sky to a low lying, freezing cloud.

I've just been out to give the girls some warm porridge. I also now have a pheasant (whom I have named Wilf) residing in the garden. As I live in a rural area and the shooting season is well and truly upon us, he is more than welcome to live in my garden. 

Tomorrow I have to put up some temporary covered housing for the girls as the dreaded Avian Flu has struck again. Everything has to be disinfected and foot baths organised to help keep the risk of infection down. I don't think a lot of people who go out and get chickens on a whim realise some of the things you have to do, especially if your girls free range like mine do. Oh well :(

I want to share with you today a card I made for a dear friend a couple of weeks ago. As the card was for a male friend, I wanted to keep the colours quite masculine without being boring.


What you need...

Dies:
Fall Leaves - Waffle Flower

Stamps:
Painted Shapes - Concord & 9th
Happy Happy Happy - Lawn Fawn

Patterned paper:
Into the Woods Remix 6x6 Petite Paper Pack - Lawn Fawn

Ink pad:
Dark Chocolate - Gina K Designs

Card stock:
White

Embellishments:
Droplets Crystal Clear Hearts - Little Things From Lucy's Cards
Natural twine

Extras:
Foam sheet
Adhesives

What you do...

1 Die cut the leaf outline in white card and the background of the leaf once in foam sheet and once in striped paper. Assemble the leaf then back with the foam.

2 Create an 11cm x 14cm white top fold blank and stamp the heart from the Painted Shapes set centrally at the top in Dark Chocolate ink.

3 Fix the leaf to the heart.

4 Stamp the sentiment underneath the heart.

5 Add a bow made from natural twine to the base of the leaf and add some Crystal Clear Hearts to decorate.

I am a big follower of Cathy Zielske on YouTube and she did a wonderful card using this die set and paper pad. So I used her make as inspiration for my card. You can find her tutorial here.

The colour scheme of the paper pad is perfect for those masculine cards and the plus side is that the patterns aren't overly cutesy or girly.

Well, I think that is me for now. I will be hopefully back soon with some Christmas cards (life just keeps getting in the way).

Thanks for popping by. Keep safe and warm!

Wednesday, 18 November 2020

Cold Outside

Good afternoon!

I know I promised another Halloween card, but I got busy and too much time has passed now, so I will share it with you next year...maybe. So, I have a lovely Christmas card instead.

This elegant card uses some simple die cut snowflakes with some Distress Oxide ink a printed die cut sentiment and a touch of sparkle.


What you need...

Dies:
Large Snowflakes - Paper Smooches

Ink pads:
Salty Ocean Tim Holtz Distress Oxide - Ranger

Printed die cut:
Wish Season Ephemera Pack - Fancy Pants Designs

Shimmer Spray:
Sparkle Sheer Shimmer Spray - Imagine Crafts

Embellishments:
Blue Lagoon Lucky Dip - Little Things from Lucy's Cards

Cardstock:
White

Extras:
Foam sheet
Adhesives

What you do...

1 Cut a piece of white card 3⅝" x 4⅞" and apply Salty Ocean ink in the centre with a blending brush or foam pad blending out the edges.

2 Spray Sparkle shimmer over the surface allowing some larger droplets to fall. Allow to dry.

3 Die cut two large snowflakes in white card and three small snowflakes. Arrange onto the inked panel.

4 Mat the inked panel onto a smaller piece of foam sheet. Create a 4¼" x 5½" white blank and mat the panel centrally onto it.

5 Add some gems and sequins to the centre of the snowflakes and add the sentiment with foam pads.

I'm afraid my photo doesn't really do the card justice. I can't seem to get the right settings on my camera for good close up work. The exposure is never spot on. I tend to take the photos in the conservatory with good daylight, but I can't get it right. Any tips would be highly appreciated.

This card would be great using any snowflake dies that you have in your stash along with any printed die cut sentiments you may have or stamp your own. For a different look it would be lovely with a red inked background.

Well, thank you for popping by and I'll be back soon with another Christmas card soon.

Keep safe and take care! x


Tuesday, 3 November 2020

Boo!

Hello there!

I know that Halloween has been and gone, but I did make a few cards for some friends and I just never got round to posting them up to share with you. So, for the next few posts I will show you the Halloween cards I created.


What you need...

Stamps:
Pumpkinhead by Tim Holtz (CMS309) - Stampers Anonymous
Chevron Backdrops - Lawn Fawn

Dies:
Caps Bold - Altenew

Ink pads:
Marmalade - Concord & 9th
Onyx Black - Versafine

Embossing Folder:
Swiss Dots - Cuttlebug

Sprinkles:
Let's Polka - Little Things from Lucy's Cards

Sparklets:
Rainbow - Buttons Galore & More

Card stock:
Black
White

Extras:
Foam sheet
Adhesives

What you do:

1 Trim a piece of white card 4¼" x 5½". Apply black ink to the wide chevron stamp and with the card landscape, stamp the image diagonally across the top.

2 Stamp the pumpkin in the lower right corner, again with black ink.

3 Blend the Marmalade ink onto some white card stock fading it towards the bottom. Allow to dry.

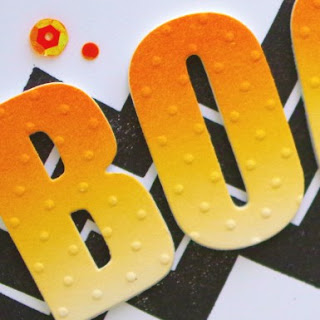
4 Die cut the 'B', the 'O' twice and the 'I' from the blended card and again from a foam sheet. Emboss the letters with the Swiss Dots folder.

5 Attach the blended letters to the foam letters.

6 Create a 4¼" x 5½" white landscape bank and cover with black card. Trim the stamped panel to 4" x 5¼" and mat onto the blank.

7 Attach the letters to the blank over the chevrons, using the 'I' as an exclamation mark. Add some orange sequins from the Sparklets Rainbow and orange dots from the Sprinkles Let's Polka.

Ta da! A spooky card. Keeping the colour scheme to white, black and orange gives the card a fresh look whilst maintaining the Halloween feel.

Okay, I want to promote something now. I was never happy with the bone folders I had in my stash. They always seemed to leave shiny marks on the paper/card stock. I saw that a lot of card makers used a Teflon bone folder, but I couldn't justify paying around £26.00 for one.

I did some searching and found a company based here in Norfolk that specialises in book binding and preservation. They sell two sizes of Teflon bone folders, a medium one for £7.95 and a large one for £8.95 excluding VAT. Even with postage and VAT added I still only paid around £14.94. 

To me, it looks exactly the same as the ones sold for crafting. I love it and no more shiny marks. It scores very smoothly and has some weight to it, perfect for strengthening those folds. The company is called Preservation Equipment Ltd, click here to take you to the bone folder page.

Well, that's me for today. I will try to get the other cards uploaded in the next couple of days. Thank you for popping by!

Take care and keep safe x