Thursday, 10 January 2013

What's New Pussycat?

Heevnin' peepsicles!

The weather is foggy and chilly here today, definitely January weather :(

Sorry I've not been around for a couple of days. I've been busy with commissions for Let's Make Cards and Crafts Beautiful.

I'd like to show you the birthday card I made for my niece Emily (you may remember from a previous post that she had the afro and goaty bubbles).

What you need...

Stamps: It's a Mod Mod World (W-7512) - The Cat's Pajamas; Quatros Snippets (LL994) - Hero Arts
Card Stock: white, lime, purple, turquoise
Ink: Onyx Black, Versafine; Lime, Mountain Lake, Violet - Versacolor
Brads: black, small
Acetate
Adhesives

How you do it...

Trim a 15cm square blank so that is angular. Repeat with dark turquoise and white card. Mat onto the blank.

Stamp the cat and stars onto lime card and trim. Stamp the television and cut out the screen, back with acetate, trim angular and attach brads over the knobs and antenna.  Mat onto the cat image with foam pads. Mount onto an angular piece of purple card, attach to the lower right corner of the blank.

Stamp the sentiment, trim, mount onto lime card and fix to the upper left corner, overlapping the edge of the card slightly.

Stamp a few Snippets around the television in coloured inks, stamp twinkles over them in black ink and a few twinkles around the top of the television. On a piece of white card, stamp a Snippet in Mountain Lake and a twinkle. Trim, mat onto turquoise card and attach to the left of the blank.

I just adore this stamp set. The images are just my thing, with the whole 1950's/1960's retro look. This set reminds me of a cartoon called 'The Jetsons' and some Looney Tunes/Merrie Melodies. Yes I love Looney Tunes too - in fact we are building quite a collection on DVD - Daffy Duck & Bugs Bunny? My heroes. Bwah ha ha ha! Warner Bros. also did some quirky one off cartoons, which again are very retro and I love to watch.

Right, that's me for the nonce. Off now to finish the sausages in onion gravy - we're having it with huge Yorkshire Puddings (which I do make myself - smug look on face).

Thanks for calling, until next time. xxx


Saturday, 5 January 2013

Flowery Thanks

Hello folks!
Saturday already. Simon only went back to work Thursday and now he's off for the weekend, a two day week - not bad :) Hope you are all having a lovely 2013 so far.

Today I thought I would show a thank you card I made for Crafts Beautiful way back in the March 2012 issue. It was part of the Cut Out & Keep feature.


What you need...
Stamps: Curly Flowers (CG136); Thanks Flowers (CG137) - Hero Arts
Card stock: white, black, orange
Ink: Onyx Black - Versafine
Embossing Powder: Detail Clear - Stampendous
Promarkers: Amber, Bright Orange, Sunflower, Yellow, Lime Green, Ice Grey 1
Ribbon: lime green patterned
Rub-ons: Hunky Dory Alphabet (655085) - Sizzix
How you do it...
On a 10cm x 28cm piece of white card, score lines at 10cm, 20cm and 24cm, fold to create a double tent fold blank. Cover the facing inside panel with orange card. Stamp, emboss and colour in three long stemmed flowers, highlight around the edges with the Ice Grey 1 Promarker. Cut out, mount onto black card and trim.

Adhere two of the flowers to the orange panel, overlapping the top and left edges. Cut a wavy edge along a piece of 10cm wide card and attach to the base of the flowers.

Stick the remaining flower to the front panel, positioning it so it sits between the other two. Wrap and tie green ribbon around the bottom edge and tie in a knot on the left. Use rub-on letters to create the sentiment.

Ta da! There you have it. A cute, bright, cheerful card.
I did a pink card, a turquoise and lime card and a purple tag for the remaining projects. They were very bright and vibrant. I think this one would look really good in those colours too. It would make a lovely Mother's Day card.

Hope you like this little project. Thanks for stopping by, until next time.....xxxx


Friday, 4 January 2013

January Blog Candy!

Heevnin chaps!
 
Just a quick reminder about my January blog candy giveaway. Just click on the 'Win Blog Candy' link in the sidebar, this will take you to the candy and explain how to enter the giveaway!
 
I was going to post another thank you card, but there seems to be a problem with some users of Blogger uploading pictures. I think I'm one of those users :(
 
I'll post it as soon as I can :)
 
Ta for dropping in! xxx

Thursday, 3 January 2013

Dave, Mark Antony & a Mad Scientist!

H'afternoon chums!

Hope you all had a fabulous New Year's Eve/Day/Night! We went out in fancy dress to our local, The Vernon Arms. A merry time was had by all.

I went as Dave (it's what everyone calls me - not telling you why though - bwah ha ha ha) a 1970's film star of a certain nature and Simon went as a roman centurion (he liked to think himself as Mark Antony). Needless to say we had a great night. 
At The Vernon I asked for a manly film star drink of a pint of bitter with a straw, slice of lemon, a cherry and an umbrella, but they could only accommodate the lemon and straw. Luckily I don't get tipsy on bitter, but after a couple of glasses I went onto the ol' lime and soda.

Here are a couple of piccies...

Simon was doing his Mad Mark Antony face here - scary!

We were out on New Year's Night too. I think I'm a bit partied out now. We seem to have been out more this Christmas than any other I can remember. Saying that, we're out tomorrow night - gasp!

Right - ho! On with the proper blog stuff, my first official one of 2013! A birthday card I've made for my nephew William.

What you need...
Stamps: Great Chemistry - Paper Smooches
Printed card stock: Ledger - Papermania 12x12" Kraft Basics Pack
Card stock: white, lime
Ink: Onyx Black - Versafine
Embossing powder: Detail Clear - Stampendous
Promarkers: Lime Zest, Lime Twist, Ice Grey 1, Ice Grey 3, Cool Grey 4, Black, Red, March Hare
Embellishments: Googly eyes
How you do it...
Create a 10cm x 15cm blank from the ledger card. Stamp, emboss, colour and cut out the scientist, sentiment, bottle and two vapour clouds. Cut a notch in one end of a 4cm x 10.5cm piece of lime card stock. Mat onto the card blank so the notch overlaps the left side slightly.
Attach the scientist to the right of the lime strip, cut out the centre of a vapour cloud and mat onto the remaining vapour cloud, adhere to the bottle, then attach to the scientists hand.
Cut out the sentiment to look like an explosion, fix to the blank. Stick googly eyes over the scientists own, to finish.
I think you may have guessed by now that I LOVE Paper Smooches stamps. The scientist looks good without the googly eyes, but I wanted to add just a bit more silliness to the card.
Phew! This was quite a long post. Hopefully I should be back with a shorter one tomorrow. So, I'm signing off for the nonce. Thanks for popping by. xxx

Monday, 31 December 2012

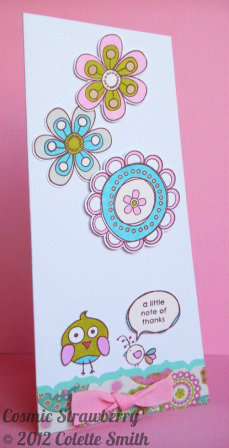
Last Post of 2012 & A Little Note of Thanks

What'cha Peeps!
Well, this is the last post of 2012 for me. It's been quite a year. I thought I would show you one of the thank you cards (for my Christmas pressies) I'll be sending out soon. It is from a past project I had in the January 2011 issue of Crafts Beautiful.


What I used...

Papers: Penny Lane 12x12 Glitter Stack - My Mind's Eye
Stamps: Petal Pushers - Bo Bunny; Green at Heart Tree Hugger - Basic Grey
Punch: Upper Crest Border - Fiskars
Card Stock: white, turquoise
Promarkers
Ribbon: pink
Ink: Rich Cocoa - Memento
Adhesives

How to do it...

Trim a white DL blank to make the top and right side angular. Stamp, cut out and colour two birds, the sentiment and three flowers. Punch the border along a piece of  turquoise card and patterned paper.

Layer the punched borders to the bottom of the card, arrange and attach the flowers, birds and sentiment. Finish with a knotted piece of ribbon applied to the patterned border.

I know that the stamps and papers are probably not available now, but you can use any you have in your stash!

I'm off now, we are going out to a fancy dress tonight (not telling you what I'm going as, just yet), so I have to get ready.

I would like to take this opportunity to wish you all a very happy, healthy and prosperous New Year. Until 2013, toodle-pip! xxx

Sunday, 23 December 2012

January Blog Candy!

Heevnin Christmas Chums!
Ooooh! I'm getting all excited. I love Christmas, the getting up early, new jim jams, open fire, chestnuts, sprouts, turkey, mug of Irish coffee, carols, candles....I could go on.
Well done to Katelyn who won the K & Company blog candy. For those who weren't lucky this time and as a big thank you to all my lovely followers plus the wonderful comments you leave, I have a new giveaway:)


It's a fantastic mixed pack of papers which include 25 sheets 12" x 12" papers, 30 sheets 8" x 8" papers and 45 sheets 6" x 6" papers. There is an assortment of spots, stripes, florals, glittered, Christmas and more. Quite a lot of them are DCWV.

To have a chance of winning this fab candy:-

1. Be a follower either through Blogger, Google or email (see sidebar to follow by email)
2. Post a piccy of the candy with a link to this post in your sidebar (if you have a blog)
3. Leave me a comment (with your blog address if you have one) ta da! You are entered!
If you do have a blog, it will be great to have a look and see what you are up to :)

This candy will close on 31st January 2013, I will then use RANDOM.ORG to choose a winner!
Go on! Why not enter? What have you got to lose?
Before I go, I just want to wish you all a very Merry Christmas and I would also like to thank everyone who has supported my blog and my work in Crafts Beautiful magazine this last year. Here's to a happy and prosperous 2013!
Toodle pip! xxx Colette xxx

K & Company Blog Candy Winner!

Mornin' Peeps!

OK, here it is the K & Company blog candy winner! I've allocated a number to each person who entered and left a comment in that order. The list is:-

1. Dawn
2. Lucretia
3. Paperkate
4. Katelyn
5. Nikki
6. Asia
7. Nelli
8. Rebecca
 
Here is a snapshot of the winner picker, and the winner is #4 - Katelyn! Congrats!  If you email me your address (my email is in my profile), I will post this fab pack of papers out to you.
 
For those of you who didn't win it this time, I will be posting another fab giveaway later today. So watch this space!
 
Until then, enjoy your Sunday and thanks to all who entered the giveaway! xxxx


Thursday, 20 December 2012

Let's Be Merry

Aft'noon Christmas Chums!
Here, as promised is the Christmas card I made for my Husband, Simon.
I saw Jenny's fab card over at the Make the Day Special blog using stamps from Paper Smooches. On one of the snowmen she used the bug stamp from the Healthy Vibes set as a 'splat'. I've used the splat idea, but with my own twist on things.
Snowball fight!!!
 
Gotcha!!

Oh Ohhh...Incoming!

We're winning!!

What you need...

Stamps: Warm Hearts, Swanky Snowdudes, All Yule Need, Freezy Fellas, Christmas Sampler, Healthy Vibes - Paper Smooches; Flora & Fauna 5 - PaperArtsy
Ink: Onyx Black - Versafine
Embossing powder: Detail Clear - Stampendous
Promarkers: Red, Lime Green, Lime Zest, Lime Twist, Bright Green, Pear Green, Cocoa, Ice Grey 1, Ice Grey 4, Mandarin, Black - Letraset
Card stock: white, turquoise
Glitter card: iridescent
Peel-offs: snowflakes, white
Glitter dots
Adhesives: double sided tape, foam tape

How you do it...

Cut large, uneven scallops in a piece of turquoise card and attach to the top of a landscape A5 blank. Create the snowy hills by cutting white card in a wavy pattern, repeat with a piece of glitter card and adhere to the blank. Make another piece from white card and attach to the bottom of the card with foam tape.

Stamp, heat emboss and colour the trees, snowmen, snowballs, star and splat. Cut out, arrange and adhere to the blank, as shown, tucking two snowmen and the trees just behind the hills.

Stamp and emboss the sentiment in black, trim into a banner and attach at the top left with a few snowflake peel-offs. Finish with a glitter dot on the star and the heart.

I used the flower centre circle from the Flora & Fauna 5 set for the snowballs. If you don't have a circle stamp, you could punch out circles from white card and draw a black sqiggly line around the edge for detail.

The snowman behind his mate getting the snowball in the kisser, didn't have a mouth, so I used one of the tiny circle stamps and coloured it black to give him that element of surprise, knowing he was going to get a snowball in the mush just like his mate.

It's great when you can mix and match stamps, you can create amazing things that you would not necessarily think of just using the one set.

Sadly, this is my last Christmas card to show you. Back to normal every occasion cards now, though I might do the odd Christmas card when I get a bit of spare 'twiddling my thumbs' time.

Right, I'm off for the nonce. Thanks for popping in and will speak soon. xxx


K & Company Blog Candy (ends soon)

Hello Peeps and happy Thursday!
It's very wet and windy here in Norfolk - boo! Anyway, I noticed my last post went live successfully whilst we were away (now have a smug look on me ol' mush).
We had a lovely, if very tiring weekend. It's a long tedious journey, but it's worth it to see everyone. I made some of my famous mulled wine round at my Sister's on Saturday night. It is very potent and not for lightweights. Yvonne & I were soon a bit squiffy!
This post is just a reminder that the K & Company blog candy giveaway ends tomorrow. I'll probably pick the winner sometime over the weekend. Good luck and a big hug and thank you to all you lovely peeps who have entered. It really is a fab set of papers, definitely classic K & Company. As I mentioned in the original post, some of these are now discontinued or have been part of an exclusive collection, not readily available in the shops.
I have several sheets of each design and I know I will never get the chance to use them all, so I thought it would be nice to share them and let someone else create something wonderful with the papers.
That's it for now. I'll be back later today with the Christmas card I made for Simon. Until then, take care. xxx

Saturday, 15 December 2012

Crafts Beautiful January 2013 - Pt 3

Well hello there!
 
If you are reading this then my schedule post has worked. Yippee! We're at my mum and dad's in Yorkshire delivering pressies, but we will be back soon.
 
Simon's dad is feeding Bazoo for us. She will not be happy. There is nothing worse than a sulky cat. Bazoo is the only cat I have ever known that can ignore you from another room. You can feel the vibes! They come through the wall at you. You just know you are being ignored. Don't know how she does it, but she does.
 
Anyway, onto the final part of my projects in the January issue of Crafts Beautiful.


I had to use pages from a book and being ex-library, I didn't know whether I could bring myself to tear pages from a new book. It was bad enough in the library tearing up and throwing away old, tatty books!
 
One of my favourite books is Far from the Madding Crowd by Thomas Hardy, so I purchased a copy, steeled myself and tore the first page out (after about half an hour of hesitation, weeping, wailing and huge waves of guilt). The thing is I knew it was going to go on a lovely card, not in the bin, so it wasn't that bad. I'm really pleased with the way these turned out and will definitely be doing some more.
 
As it's nearly Christmas, why not treat yourself to a subscription of Crafts Beautiful? Or better still, drop a few very loud and not so subtle hints to your nearest and dearest. It makes a great present. The free gift for subscribing at the moment is a set of beautiful Tilda storage tins, and as an extra gift you get a free binder for your magazines. Can't be bad! It's great having each issue drop onto your door mat. No more missed copies (and you usually get it before it hits the shops - bwah ha ha har).
 
That's me for now. Hopefully I'll be back soon with some more cards to show you. Ta ta! xx