Monday, 24 August 2020

Stitched Hearts

Hello there!

I hope you are all well. I would like to share with you, if I may, a simple little card featuring a cute heart taken from the Paper Smooches stamp set - Needle Little Love. 

This card combines simple masking and stamping techniques. I finished off the card with the word 'Hi', but it could be adapted to a Valentine's or anniversary card by simply changing the sentiment.


What you need...

Stamps:
Needle Little Love - Paper Smooches

Ink pads:
Magenta - Avery Elle Pigment Ink 
Orchid
Raspberry
Onyx Black - Versafine

Masking paper: 
Stamping Mask Paper - Inkadinkado

Card stock:
White

Gems:
Clear

What you do...

1 Stamp a vertical row of four hearts onto white card with the Onyx Black ink so the stitches line up.

2 Stamp the hearts onto masking paper and cut out. Place over each of the hearts.

3 Apply the inks over the hearts so the paler shade of pink is at the top blending down to the deeper shade.

4 Remove the masks and trim the hearts leaving a narrow white border down each side.

5 Mat the heart strip down the left side of a white blank 10.5cm x 15cm trimming away any excess from the top and bottom. Stamp the 'hi' in the lower right corner and finish with some clear gems.

Sadly Paper Smooches are now closed for business. I will however continue to use their stamp and dies sets as they have such wonderful images and they are one of my favourite go to companies. Plus, I know a lot of people own many of their products. So look out for more of my makes featuring Paper Smooches!

Well, I have to sign off now. Thank you for stopping by and I'll be back soon.Take care!


Sunday, 9 August 2020

Rainbow Unicorn

Good afternoon blog friends!

I'm back with an adorable make using a stamp and die set that I have been itching to play with. I have had it some time, but a friend asked to make a card for her granddaughter's birthday. As she loves unicorns I thought this was the perfect set to use.
What you need...

Stamps:
Decorate A Cake Stamp Set (CM438) - Hero Arts

Dies:
Decorate A Cake Frame Cuts (D1741) - Hero Arts

Promarkers:
Fresh Bloom*
Magenta
Mandarin
Yellow
Lime Green
Cyan
Cool Aqua
Purple

*Limited Edition

Ink pad:
Obsidian Amalgam Ink Pad - Gina K

Sprinkles:
Let's Polka - Little Things From Lucy's Cards

Patterned paper:
Really Rainbow 6x6 Paper Pad - Lawn Fawn

Card stock:
White

Font:
Enjoy Writing - Khurasan

What you do...

1 Stamp the cake and add the eyes and icing. Stamp the flower cluster, the large flower, the horn and two ears.

2 Colour in the images and cut out using the coordinating dies. Assemble the cake.

3 Create an 11cm x 18cm white card blank. Cover the bottom 6cm with rainbow paper.

4 Print a sentiment, trim and fix to the rainbow section with foam pads. 

5 Attach the unicorn to the top of the blank and add sprinkles around the image.

The font that I used is for personal use only, I must point out that I do not make cards to sell and I did not charge my friend for this card, so the use of this font was for personal use. Free fonts are okay to use for personal use, however if you do sell your cards, then you will have to purchase a commercial use version. To access this and many more by Khurasan check out FontSpace  or dafont.com, 

I decided to go with a tall blank for this make. Tall cards seem to be making a come back at the moment, I remember when tall slim and DL sized card were all the rage. 

I was really pleased with how this card turned out. The photo doesn't really do it justice and it is so cute in 'real life'. Needless to say, my friend was very pleased with it.

Okay, I'm going to sign off for now. Enjoy the rest of your weekend and I'll be back soon.


Sunday, 26 July 2020

Rainbow Heart

Hello there!

Sorry I haven't been around for a while. I recently went away for a few days with some friends to a remote cottage up in the Lake District. We did lots of walking and laughing! After getting home, I had to get a few projects done for the magazines, so sadly the blog had to wait.

Well I'm back now! I have a lovely little heart/rainbow themed card to share with you. I hope you like!

What you need...

Stamps:
Positive Strokes - Paper Smooches

Dies:
Hello Love - Paper Smooches

Ink pads:
Bluebird - Wendy Vecchi
Buttercup
Tiger Lily
Peony Purple - Impress
Sour Apple - My Favorite Things
Melon Mambo - Stampin' Up!

Gems:
Black

Card stock:
Black
White

What you do...

1 Trim a piece of white card 10cm square. Stamp the brush strokes vertically down the left hand side in rainbow colours.

2 Cover a 10.5cm square blank with black card and mat the rainbow panel onto it.

3 Die cut the heart several times in black card (I did five) and stack together with wet adhesive.

4 Attach the heart towards the right of the blank. Add some gems to decorate.

I love the bright rainbow brush strokes against the white background and the black just makes the whole thing pop.

Stacking several die cuts really makes the image pop. You can get the same effect by cutting the image once in your chosen card and then once in craft foam. A great technique.

Well, that is all for now. Thank you so much for stopping by and I'll be back soon with another make. It won't be long now before I start posting Christmas makes up - yikes!

Take care!

Saturday, 4 July 2020

I Wet My Plants

Hello there and happy Saturday!

I've been really busy of late with lots of work for the magazines, so I now have a bit of time to update my blog and share with you another cute make.

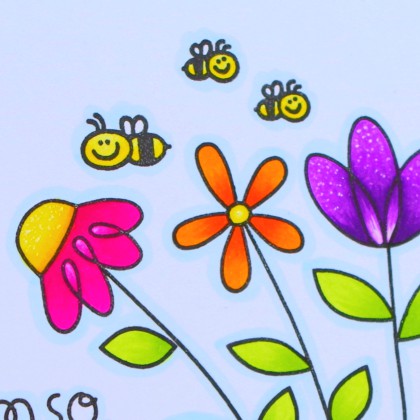
This one uses my fave, Paper Smooches! I teamed up Paper Smooches stamps with dies to create a lovely little scene with an adorable bear and some colourful flowers.

What you need...

Stamps:
Chubby Chum Pals - Paper Smooches
Twiggy Florets - Paper Smooches
Perky Plants

Dies:
Stitched - Paper Smooches

Copic:
Cerise R006
Fuchsia RV09
Lilac V04
Violet V09
Acid Yellow Y08
Lemon Yellow Y13
Pale Celestine B0000
Chrome Orange YR04
Cadmium Orange YR07
Toast E34
Chamois E35
Brick White E40
Pearl White E41

Ink pad:
Extreme Black - My Favorite Things

Gel pen:
White UM-153 Signo - Uni-ball

Card stock:
White
Lime

What you do...

1 Cut a piece of white card 10cm x 14cm, stamp three flowers and the sentiment from the Twiggy Florets set, some bees from the Perky Plants set and colour in.

2 Stamp the bear onto white card, colour in and cut out.

3 Die cut the curved stitches onto lime card, trim so it measures 10cm wide and approximately 4cm high. 

4 Attach the lime section below the plants and then adhere the bear in front of the plants with foam tape.

5 Adhere to a 10.5cm x 14.5cm white blank and add some detail to the plants with the white gel pen.

There you have it. I think the sentiment is hilarious. I bought the stamp set solely because of that one sentiment. Have you ever done that? Bought a stamp or die set just for one image or sentiment.

I hope you like this cute little make. I'm off now to go and sort the chickens out, they are after their afternoon corn!

Thank you for dropping by and hopefully back soon.


Monday, 15 June 2020

Sweetie Pie

Hello there!

I'm back with another card to share with you. This one is in my usual style of clean and simple with oodles of cuteness!

I used stamps from one of my fave companies, Paper Smooches. This is quite a small card, 8.5cm x 12.5cm which makes it ideal for a quick note card or a 'just because' card.

What you need...

Stamps:
Bee Mine - Paper Smooches
Boob Tube - Paper Smooches

Ink pads:
Extreme Black - My Favorite Things
Sky Blue #38 - Versacolor

Promarkers:
Berry Red, Champagne*, Ice Grey 3, Lipstick Red, Raw Sienna, Sandstone

Masking paper:
Stamping Mask Paper - Inkadinkado

Card stock:
White, Kraft

*Limited Edition

What you do...

1 Stamp the pie, steam and three hearts onto white card in black ink.

2 Stamp them again onto masking paper and cut out. Place the masks over the corresponding images.

3 Use a blending tool to blend Sky Blue ink over the image, focusing the depth of colour over the actual pie.

4 Remove the masks and colour in the images.

5 Stamp the sentiment underneath the pie.

6 Trim the image to 6.5cm x 9.5cm and mat centrally at the top of a Kraft blank 8.5cm x 12.5cm with foam tape.

There you have it! A cute little note card. Mixing and matching your stamp sets makes them go a lot further with infinite possibilities and they don't have to be the same brand.

I'm going to sign off now, Thank you for popping by and I will see you next time.


Thursday, 4 June 2020

Born Today - Cricut

Good afternoon!

It's been a couple of weeks since my last post. A few things have been happening in my life and unfortunately the blog took a back burner, but I'm back now.

A very dear friend asked me to make a birthday card for his husband. I went through the Cricut design store and found a perfect image. I kept to the colours used by Cricut as I found them to be quite clean, fresh and masculine.

Here is the card...

What you need...

Cricut image: 
Someone I Love Was Born Today (#M8B6A72E) - Let's Eat Some Cake set

Card stock: 
navy, teal, coral, white

Embellishments: 
Droplets Crystal Clear Hearts - Little Things From Lucy's Cards


What you do...

1 Purchase and download the images to your canvas.

2 Re-size to fit your chosen card blank. I used a 15cm square blank.

3 Send to cut in the colours of your choice.

4 Assemble onto the card blank and secure with adhesive.

5 Add some heart shaped droplets to finish.

I think this was such a lovely card to send to a male as men are so difficult to make for sometimes. You could also change up the colour scheme to make a card for a female recipient.

Handy tip: I cut the whole design out first in a scrap of card. I used the negative to help place all the final coloured pieces onto the blank. This helped keep the lovely heart shape and spacing of the little hearts.

If you haven't got access to a Cricut, then you could get a similar look by using die cut words/hearts or stamps from your stash.

So there we have it, a simple card that uses a beautiful image and colours.

I am going to sign off for now, thank you for popping by and I'll hopefully be back soon.


Tuesday, 19 May 2020

Howdy Friend

Good afternoon!

How are you? We are having some lovely weather here in Norfolk at the moment. I am not one to sit out in the sun, but it's great being able to have doors and windows open and let all that fresh air into the house.

I was so exited to be able to get hold of one of the turnabout stamp sets by Concord & 9th along with a co-ordinating die set. Finding these stamp sets in stock is like trying to find hens teeth!

I fell in love with the cactus themed stamps and dies called 'To the point'. I went with a lovely colour scheme of pool, pink, peach and lime.

A stamping platform is needed to use the turnabout stamp set. This will help to create the perfect lined up background.

What you need...

Stamps:
To the Point Turnabout - Concord & 9th
Surf & Turf - Paper Smooches

Ink pads:
Key Lime, Peach Bellini, Sea Breeze, Bubblegum Pink - Gina K
Extreme Black - My Favorite Things

Dies:
To the Point - Concord & 9th

Glitter pen:
Sparkle Crystal Clear - Spectrum Noir

Basic supplies:
Card stock, adhesives, foam sheets


What you do...

1 Use a stamping platform to create the cactus background using Key Lime, Peach Bellini, Bubblegum Pink and Sea Breeze inks. Trim away a 4.5cm x 14.4cm section.

2 Cut a piece of white card 5cm x 14cm and use the Bubblegum Pink ink pad to colour down the vertical sides. Mat the cactus panel onto this piece and adhere to the right of a 10.5cm x 14cm white top fold blank.

3 Use the ink pads to colour some white card stock. Cut the cactus from Key Lime, the pot from Sea Breeze, the heart from Bubblegum Pink and the flowers from Peach Bellini. Die cut the 'Howdy' and the trim from black card.

4 Die cut the cactus, pot and heart from foam and assemble the cactus as shown. Attach to the left of the stamped panel. Add the 'Howdy' to the top right of the blank and stamp 'Friend' from the Surf & Turf set below.

5 Highlight the cactus flowers with Sparkle Crystal Clear.

Colouring white card stock with ink pads is a great way of matching card to stamped images. These Gina K ink pads give lovely, vibrant and even coverage. Plus, as they are dye based they dry really quickly and don't smudge.

I can't wait to do this card in another colour scheme, maybe using shades of greens and blues.

I want to give this card to a friend when I see her to thank her for my birthday goodies, and for just being there for me now that I am on my own.

Thank you for popping by, I am now going to have some tea and I will be back soon with another cute make.

Thursday, 14 May 2020

Hello Honey

Hello there!

I hope you are all well.

So, I'm back with another make. This one being really cute. It mixes up two sets from Paper Smooches, Bee Mine and Blossoming Buds.

What you need...

Stamps:
Bee Mine - Paper Smooches
Blossoming Buds - Paper Smooches

Ink pads:
Extreme Black - My Favorite Things

Dies:
Bee Mine Icons - Paper Smooches

Promarkers:
Pink Pearl*, Cool Aqua, Mandarin, Sand Dune*, Yellow, Sunflower, Lime Green, Ice Grey 1
*Limited Edition Colours

Embellishments:
White pearls

What you do...

1 Stamp the floral cluster onto white card stock and colour in. Stamp the bee onto white card stock, colour in and cut out.

2 Add the bee to the floral panel with foam pads and trim to 10cm square. Stamp the sentiment in the top left corner.

3 Mat onto a 10.5cm square lime card blank. Decorate with some pearls.

I've had my Promarkers for quite a few years now and when Letraset did the limited edition sets I collected them all. It will be a shame when they run out as they are not around anymore. I keep hoping that Winsor & Newton will bring them back.

I like to use both Copic and Promarkers. Even though I have the full range of colours in both brands, there are some shades of colours in one brand that the other doesn't have. I find that when I do use both, they blend together really well. 

I love this little card, it's so bright and cheery. It's perfect to send to someone in these lonely times just to let them know that you are thinking about them.

I don't know what it is about Paper Smooches stamps, the images always bring a smile to my face. They are also a dream to colour in.

Thank you so much for popping by and I'll be back soon with another card. Take care and stay safe!

Friday, 8 May 2020

Poppy Thanks

Hello there!

I hope you are all keeping well.

I'm back with another card to share with you. This one I made for some dear friends to thank them for the birthday goodies they gave me.

I decided to go elegant with a beautiful stamp set by Altenew called Poppy Garden. I also used the co-ordinating stencil and mask set. I created the background with Tim Holtz Distress Oxide ink in Candied Apple. The photo doesn't really do the colour justice as the red in real life is a very bright true red. The centre of the poppy was highlighted with dimensional gloss by Nuvo.

So without further ado, here it is...

What you need...

Stamps:
Poppy Garden - Altenew

Stencils/masks:
Poppy Garden Mask Stencil - Altenew

Ink pads:
Extreme Black - My Favorite Things
Candied Apple Tim Holtz Distress Oxide - Ranger

Die:
Thanks - Paper Smooches

Dimensional medium:
Morning Dew Crystal Drops - Nuvo

Glitter Spray:
Sparkle Sheer Shimmer Craft Spray - Imagine Crafts

Embellishments:
Droplets - The Stamp Market


What you do...

1 Stamp the poppy towards towards the lower right corner of white cardstock 10cm x 14cm. Mask off and stamp several leaves.

2 Keeping the masks in place, apply the Candied Apple ink with a blending brush (or sponge). Blend so that the colour gently fades towards the top of the piece of card.

3 Spritz the panel with the shimmer spray, when dry remove the masks and trim the card to 9.5cm x 13.5cm. 

4 Die cut the 'thanks' several times in white card and once in black. Stack the layers finishing with the black one on top. Add to the panel just above the poppy.

5  Mat onto a white top fold blank 10cm x 14cm with foam tape.

6 Add some Nuvo drops to the centre of the poppy and attach a few droplets around the poppy to decorate.

This is another card that is a little different for me, but I so enjoyed playing with the ink and masks. It got quite messy at one point and with the ink being bright red it looked like I had massacred someone.

I love the subtle sheen that the shimmer spray gives to the background. I also like it when you get a few larger droplets of it.

I'm going to have another play with this stamp set and masks and maybe create a card where the poppies are coloured and the background is left white.

Thank you for stopping by, keep safe and well and I'll be back soon. 


Monday, 4 May 2020

Ketchup

Hello there!

I hope you are still keeping well. 

I am so off the plot at the moment. It was my birthday yesterday and I didn't realise it was coming up until the other day, plus normally today we celebrate Mayday in the UK, but I only remembered earlier today that this year it has been moved to Friday the 8th to celebrate VE day. I really need to leave orbit and come back to earth!

Anyway, on with today's card. I was going through my lovely Paper Smooches stamps sets and decided on this cute little fellow.

What you need...

Stamps:
Vegtastic - Paper Smooches
Picture It - Avery Elle

Dies:
Vegtastic - Paper Smooches

Ink pads:
Extreme Black - My Favorite Things

Patterned paper:
Highline 6x6 Paper Pad - Basic Grey

Copic:
Cool Gray C-1, Cool Gray C-3, Salmon Red R05, Cadmium Red R27, Green Bice YG01, Acid Green YG07

What you do...

1 Stamp the photo frame and cut out along with the inner section. Add Cool Grey 1 and 3 to add definition.

2 Back the inner section with a piece of the yellow patterned paper from the Basic Grey pad.

3 Stamp the 'Washi' tape strips, colour in and cut out.

4 Stamp the tomato, colour and cut out using the matching die. Fix the tomato to the patterned section of the photo frame.

5 Stamp the 'comment' section to the frame and the speech bubble with the 'We must ketchup' sentiment. Cut out the speech bubble.

6 Attach the photo frame to a white top fold 10.5cm x 14.5cm blank. Add the 'Washi' strips and the speech bubble.

After the lockdown has ended, this would be an excellent card to send to a friend to arrange a coffee and a good catch up chat.

Sadly the Picture It set is no longer available, however there are other stamp sets featuring Polaroid style frames by other brands out there. There are some dies available too. Alternatively you could create your own picture frame by cutting a rectangle with rounded corners and snipping out a section from the centre. There are also lots of stamp sets out there with speech bubbles.

I hope you like my cute little make. I've never seen such a happy tomato! 

I'm going to sign off for now. Thanks for popping by and I'll be back soon.